
Looking for a turkey that's juicy on the inside with beautifully golden, crispy skin? Spatchcocking might become your new favorite roasting technique. By removing the backbone and flattening the bird, you'll shorten the cooking time, encourage even roasting, and develop deliciously crisp skin.
It's a simple technique worth learning, and once you've mastered it, you can use it for chicken and Cornish game hens, too.
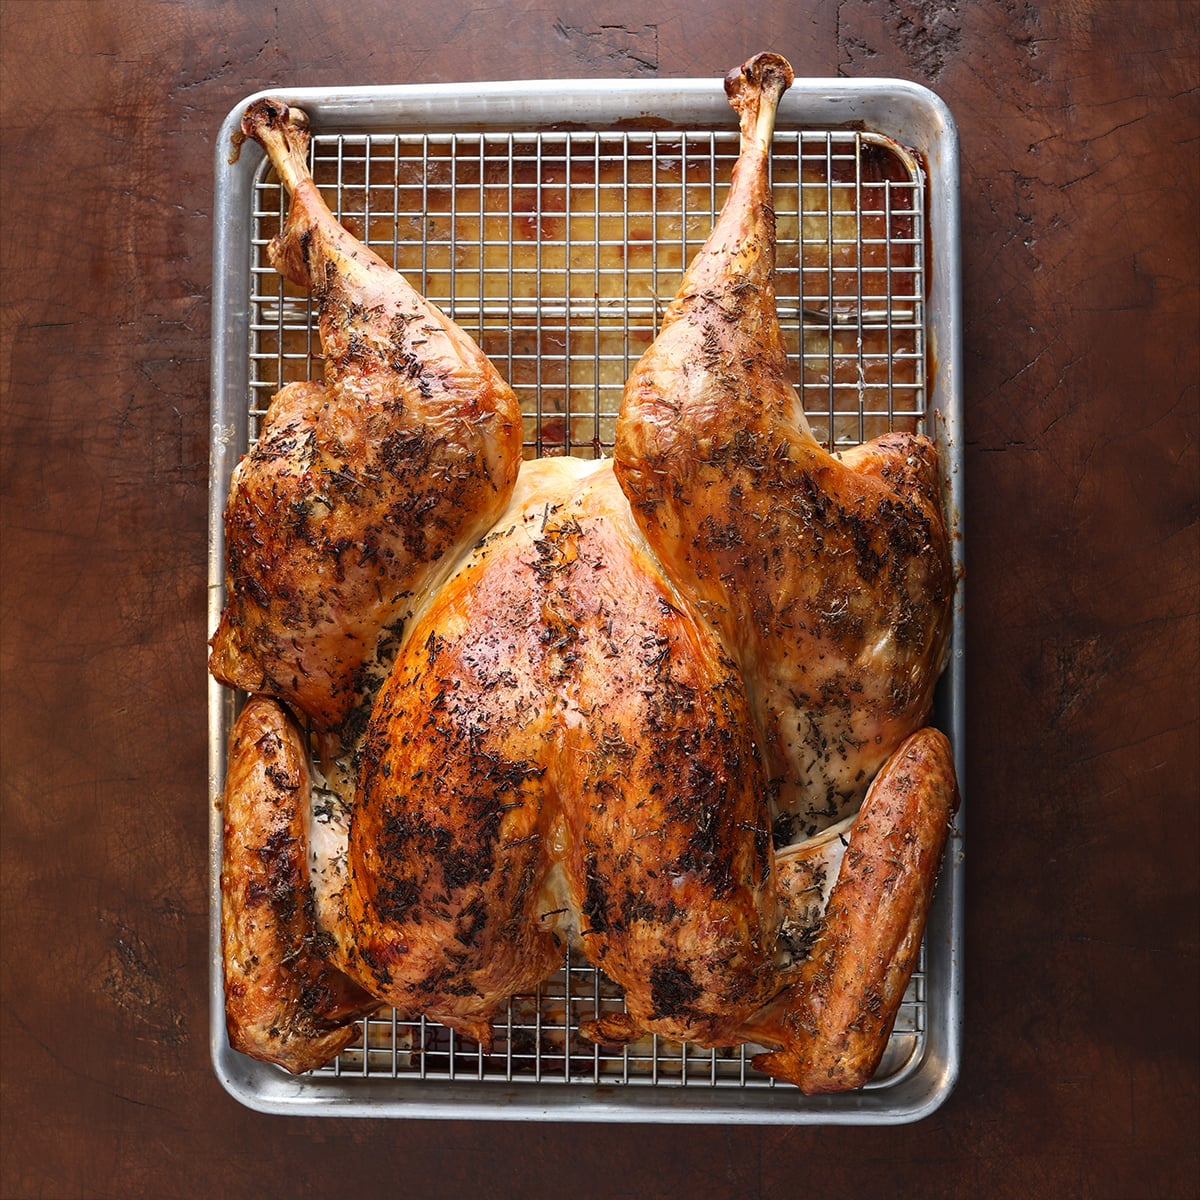
Why You'll Love This Technique
The Thanksgiving Day turkey. The centerpiece. The star of the show. The bird that an entire holiday meal revolves around. Let's take the pressure off! Easy-to-follow steps, less time in the kitchen, more freedom to enjoy the day, and one beautifully roasted turkey.
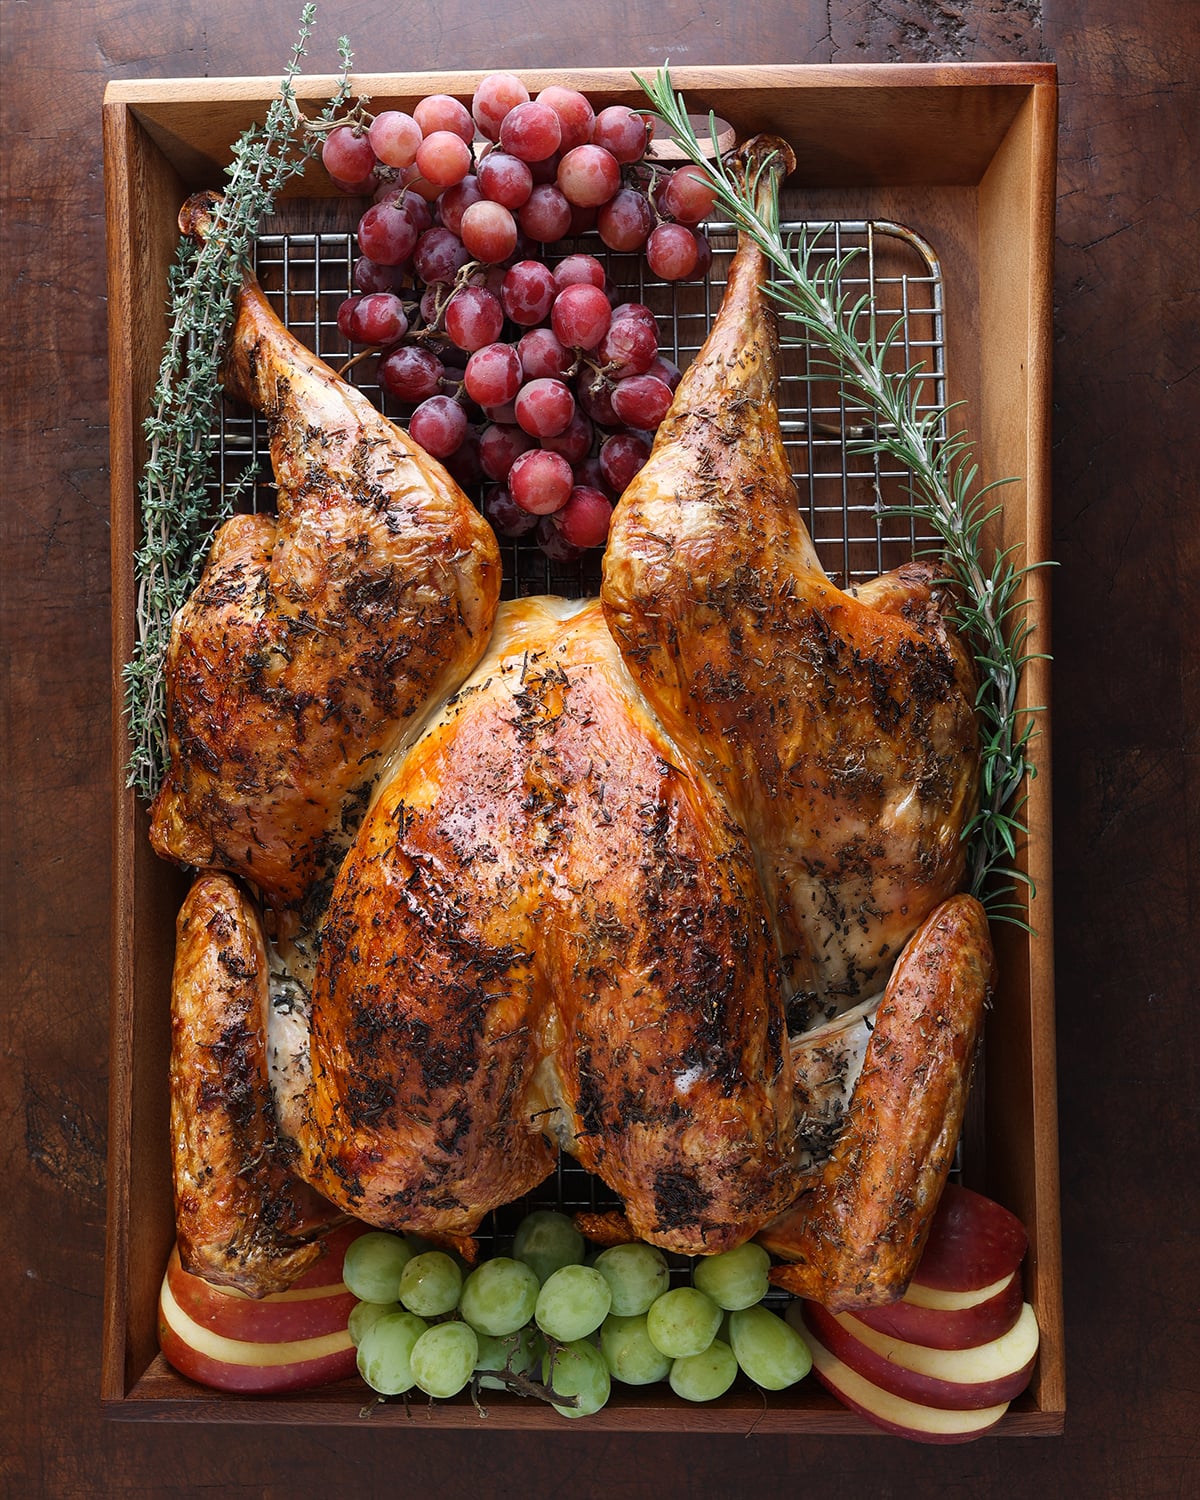
What Is Spatchcocking?
Spatchcocking, also called butterflying, is a cooking technique that involves removing the backbone of a whole bird and pressing it flat before roasting.
Instead of cooking in its traditional rounded shape, the bird lies flat, exposing more of its surface to the oven's heat.
The result? Faster, more even roasting with wonderfully crispy skin.
Why Spatchcock a Turkey?
There are three delicious reasons to give this technique a try.
- Faster Cooking: Flattening the turkey allows heat to penetrate more efficiently, significantly reducing the roasting time compared with a traditional whole turkey.
- More Even Cooking: Turkey breast tends to cook faster than the legs and thighs. Spatchcocking exposes the dark meat to more direct heat, helping both finish closer to the same time.
- Crispier Skin and Juicier Meat: With more skin exposed to the oven's heat, you'll enjoy beautifully browned, crispy skin while reducing the risk of drying out the breast meat.
How Long Does It Take to Thaw a Frozen Turkey?
Before you begin, make sure your turkey is completely thawed. A partially frozen bird is difficult and potentially dangerous to cut. The USDA recommends refrigerator thawing at 40°F (4°C) or below, allowing approximately 24 hours for every 4 to 5 pounds of turkey.
Refrigerator Thawing Guide
- 4 to 12 pounds (1.8 to 5.4 kg): 1 to 3 days
- 12 to 16 pounds (5.4 to 7.3 kg): 3 to 4 days
- 16 to 20 pounds (7.3 to 9.1 kg): 4 to 5 days
- 20 to 24 pounds (9.1 to 10.9 kg): 5 to 6 days
My Kitchen Tip: Keep the turkey in its original packaging on a rimmed tray on the bottom shelf of your refrigerator. This catches any escaping juices and helps prevent cross-contamination.
How Long Can a Thawed Turkey Stay in the Refrigerator?
Once completely thawed in the refrigerator, your turkey can safely remain refrigerated for an additional 1 to 2 days before cooking.
This gives you time to spatchcock, season, and dry-brine your turkey overnight.
Important: Dry brining does not extend the turkey's safe refrigeration period. Plan accordingly.
How Much Turkey Should You Buy?
Planning a holiday dinner or gathering? A good rule of thumb is to allow approximately 2 pounds of whole, bone-in turkey per adult and ½ pound per child. This allows for the weight of the bones and provides generous portions, with some leftovers.
Here's a simple guide to help you choose the right size turkey for your gathering.
| Number of Guests | Whole Turkey Weight |
| 4 adults | 8 pounds (3.6 kg) |
| 4 adults + 4 children | 10 pounds (4.5 kg) |
| 6 adults | 12 pounds (5.4 kg) |
| 6 adults + 4 children | 14 pounds (6.4 kg) |
| 8 adults | 16 pounds (7.3 kg) |
| 10 adults | 20 pounds (9.1 kg) |
| 12 adults | 24 pounds (10.9 kg) |
My Kitchen Tip: If you love leftover turkey for sandwiches, soups, and homemade stock, consider purchasing a slightly larger bird. For spatchcocking, however, I recommend choosing a 12 to 14-pound turkey that fits comfortably on your roasting pan. When cooking for a larger gathering, consider preparing two smaller turkeys rather than one oversized bird.
Food Safety Tips Before You Begin
Working with raw poultry requires a few simple precautions. Keep these in mind before reaching for your kitchen shears.
- Never Wash Raw Turkey: Rinsing poultry can spread harmful bacteria onto surrounding surfaces. Pat the turkey dry with paper towels instead.
- Keep Your Turkey Cold: Refrigerate at 40°F (4°C) or below until you're ready to prepare it. Never thaw turkey on the countertop.
- Use a Stable Cutting Surface: Place a damp towel beneath a large cutting board to prevent slipping. Keep your fingers clear of the kitchen shears.
- Prevent Cross-Contamination: Wash your hands with soap and water for at least 20 seconds after handling raw turkey. Thoroughly clean and sanitize your cutting board, kitchen shears, countertops, and other contaminated surfaces.
- Cook to a Safe Temperature: Use a meat thermometer to ensure the thickest part of the breast, innermost thigh, and innermost wing all reach at least 165°F (74°C).
Tools You'll Need
You won't need much specialized equipment, but a sturdy pair of poultry shears will make this job considerably easier.
- Heavy-Duty Kitchen Shears: Choose sturdy poultry shears designed to cut through small bones and cartilage. Please be very careful, these are a powerful tool.
- Large Cutting Board: Use a turkey-size cutting board, preferably with a juice groove to collect drippings.
- Rimmed Baking Sheet: Choose a sturdy pan large enough to accommodate your flattened turkey.
- Wire Roasting Rack: Elevates the turkey for better airflow and allows the skin to dry during refrigeration.
- Instant-Read Meat Thermometer: Essential for determining when your turkey is safely cooked.
- Ninja Express Chop: for pulsing the fresh herbs, salt and pepper

How to Spatchcock a Turkey
At first glance, removing the backbone of a whole turkey might seem intimidating. But with sturdy kitchen shears, a stable cutting surface, and a little confidence, it's surprisingly straightforward.
The goal is simple: remove the backbone, flatten the breastbone, and tuck the wings beneath the bird.
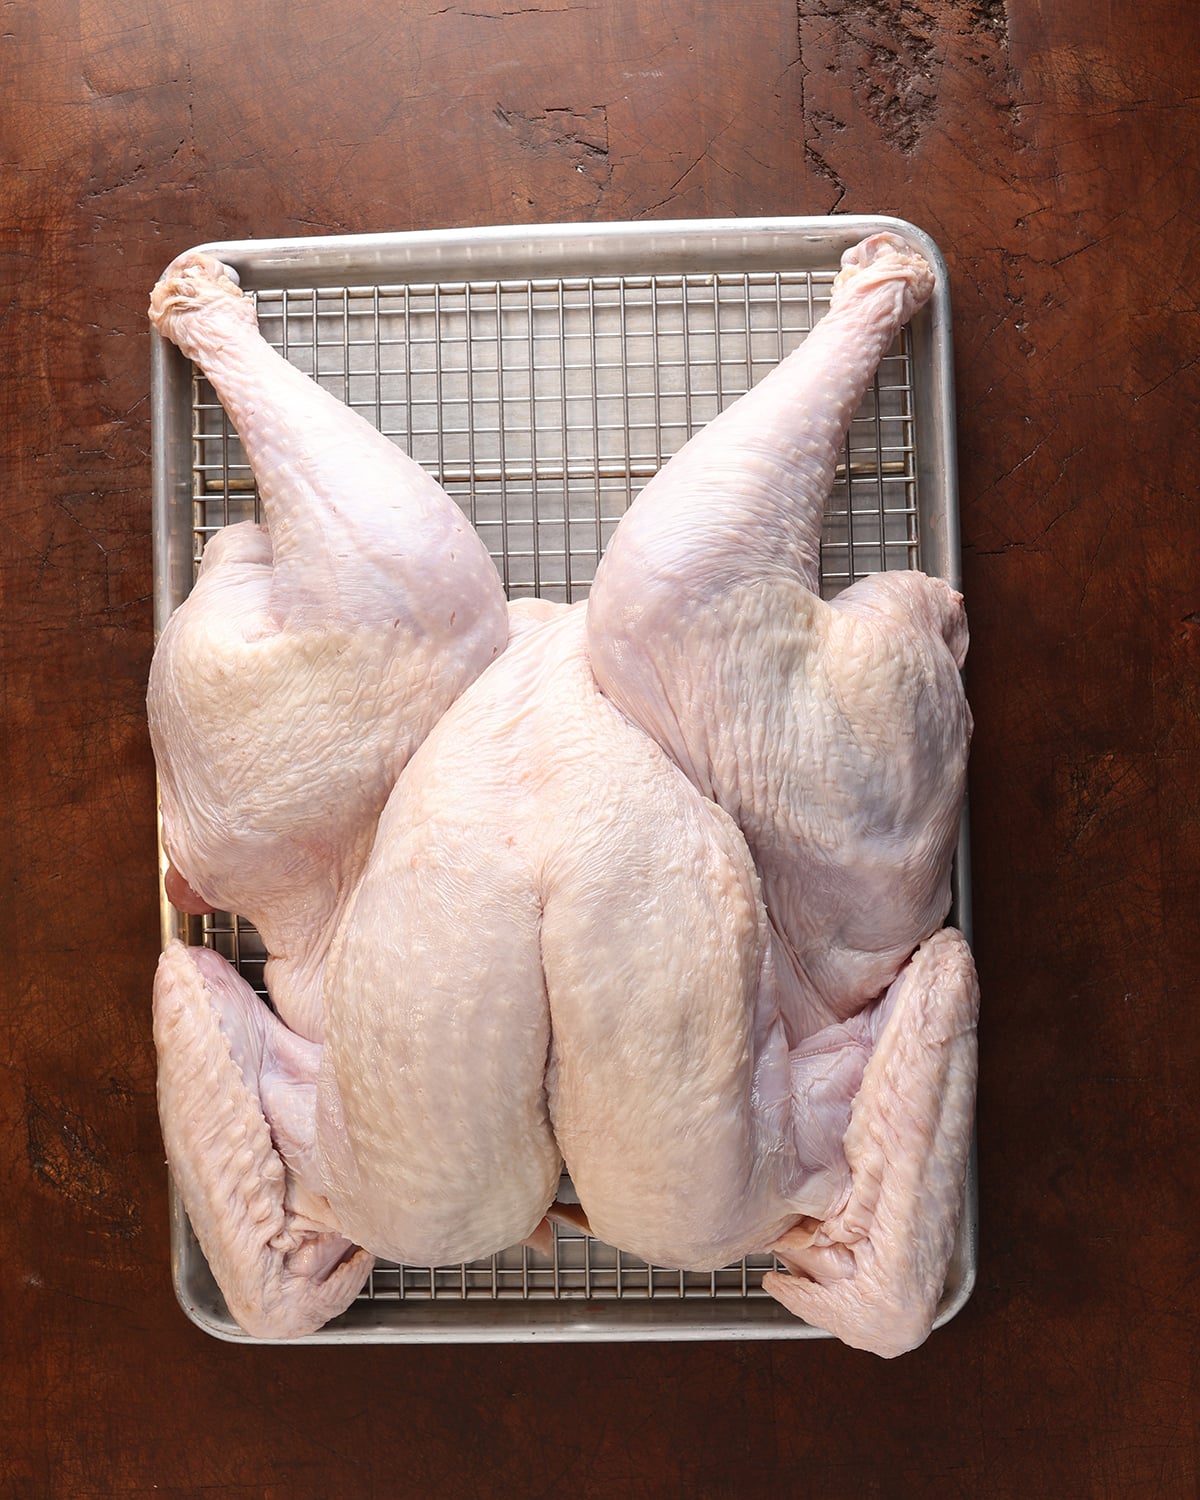
Ingredients
- 1 whole turkey, completely thawed, 12 to 14 pounds (5.4 to 6.4 kg)
- 2 tablespoons kosher salt
- 2 teaspoons coarsely ground black pepper (approximately 5 g)
- 1 tablespoon fresh rosemary, minced (approximately 3 g)
- 1 tablespoon fresh thyme, minced (approximately 3 g)
- 1 tablespoon fresh sage, minced (approximately 3 g)
Before You Season: Check your turkey's packaging. If it has been pre-brined, injected, or enhanced with a salt solution, reduce or omit the additional salt to avoid an overly salty bird.
Step-by-Step Instructions
- Prepare the Turkey: Remove the packaging, neck, and giblets from the completely thawed turkey. Pat the bird dry with paper towels and place it breast-side down on a large, stable cutting board. Position a damp towel or silpat mat beneath the board to prevent slipping.
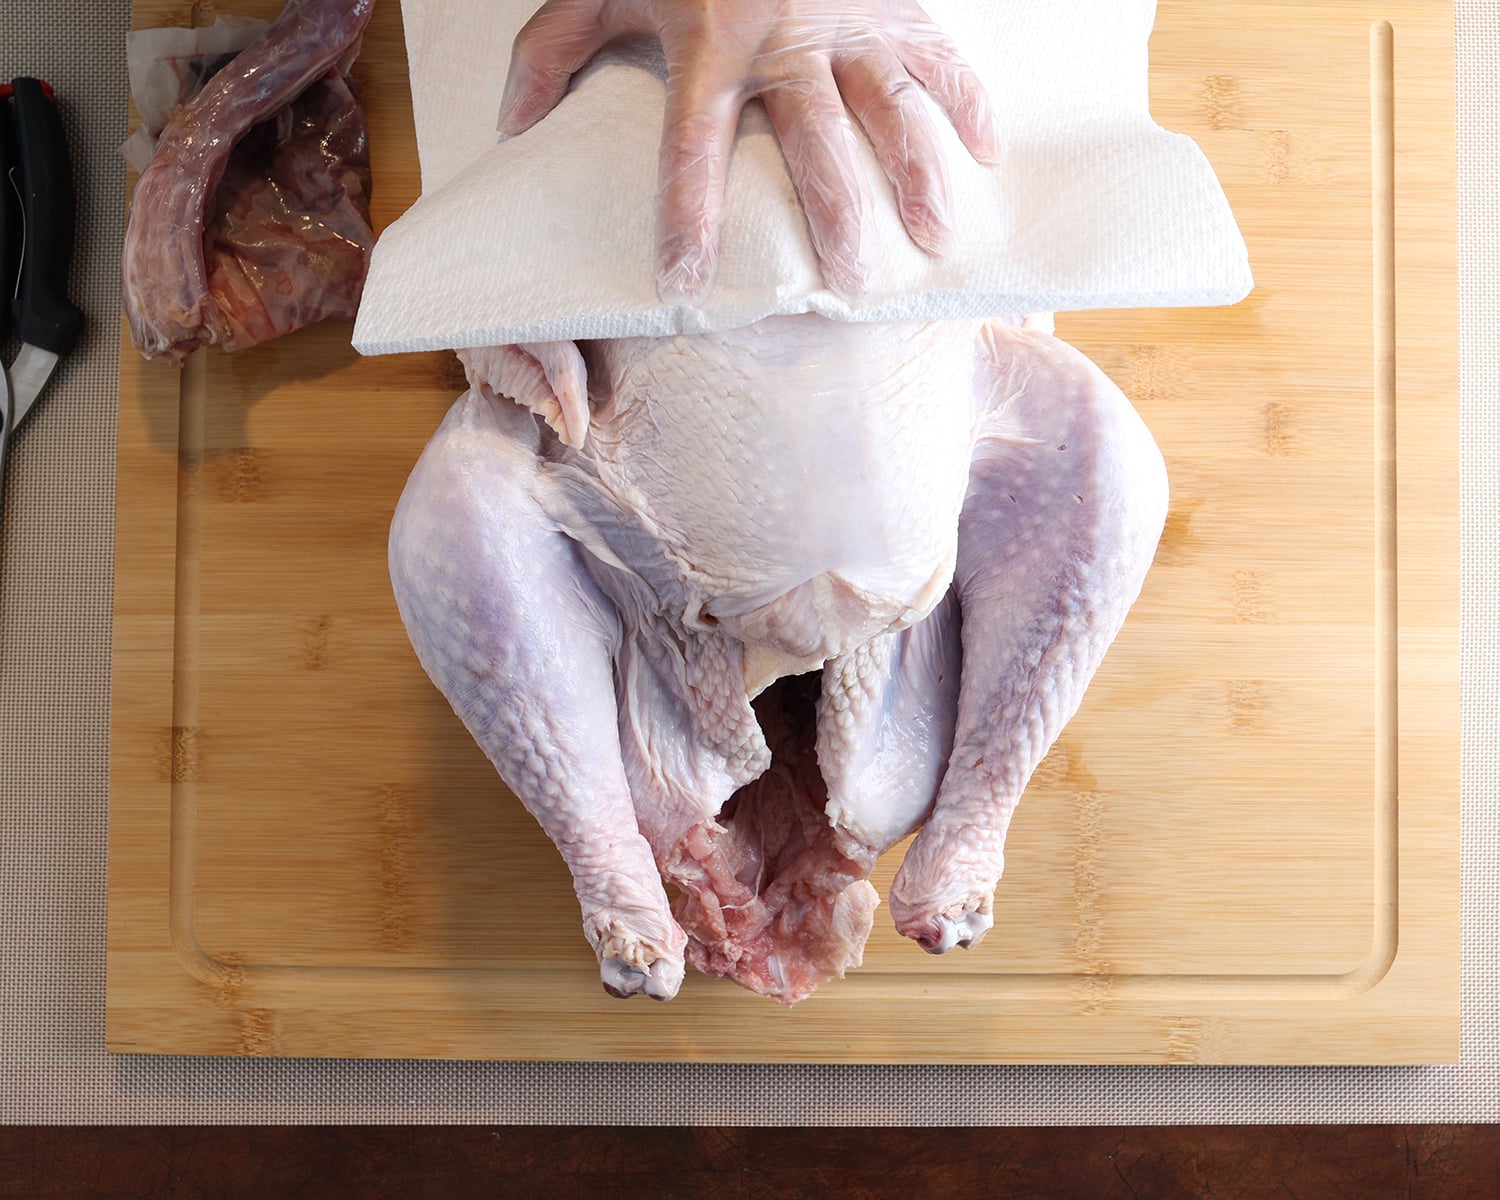
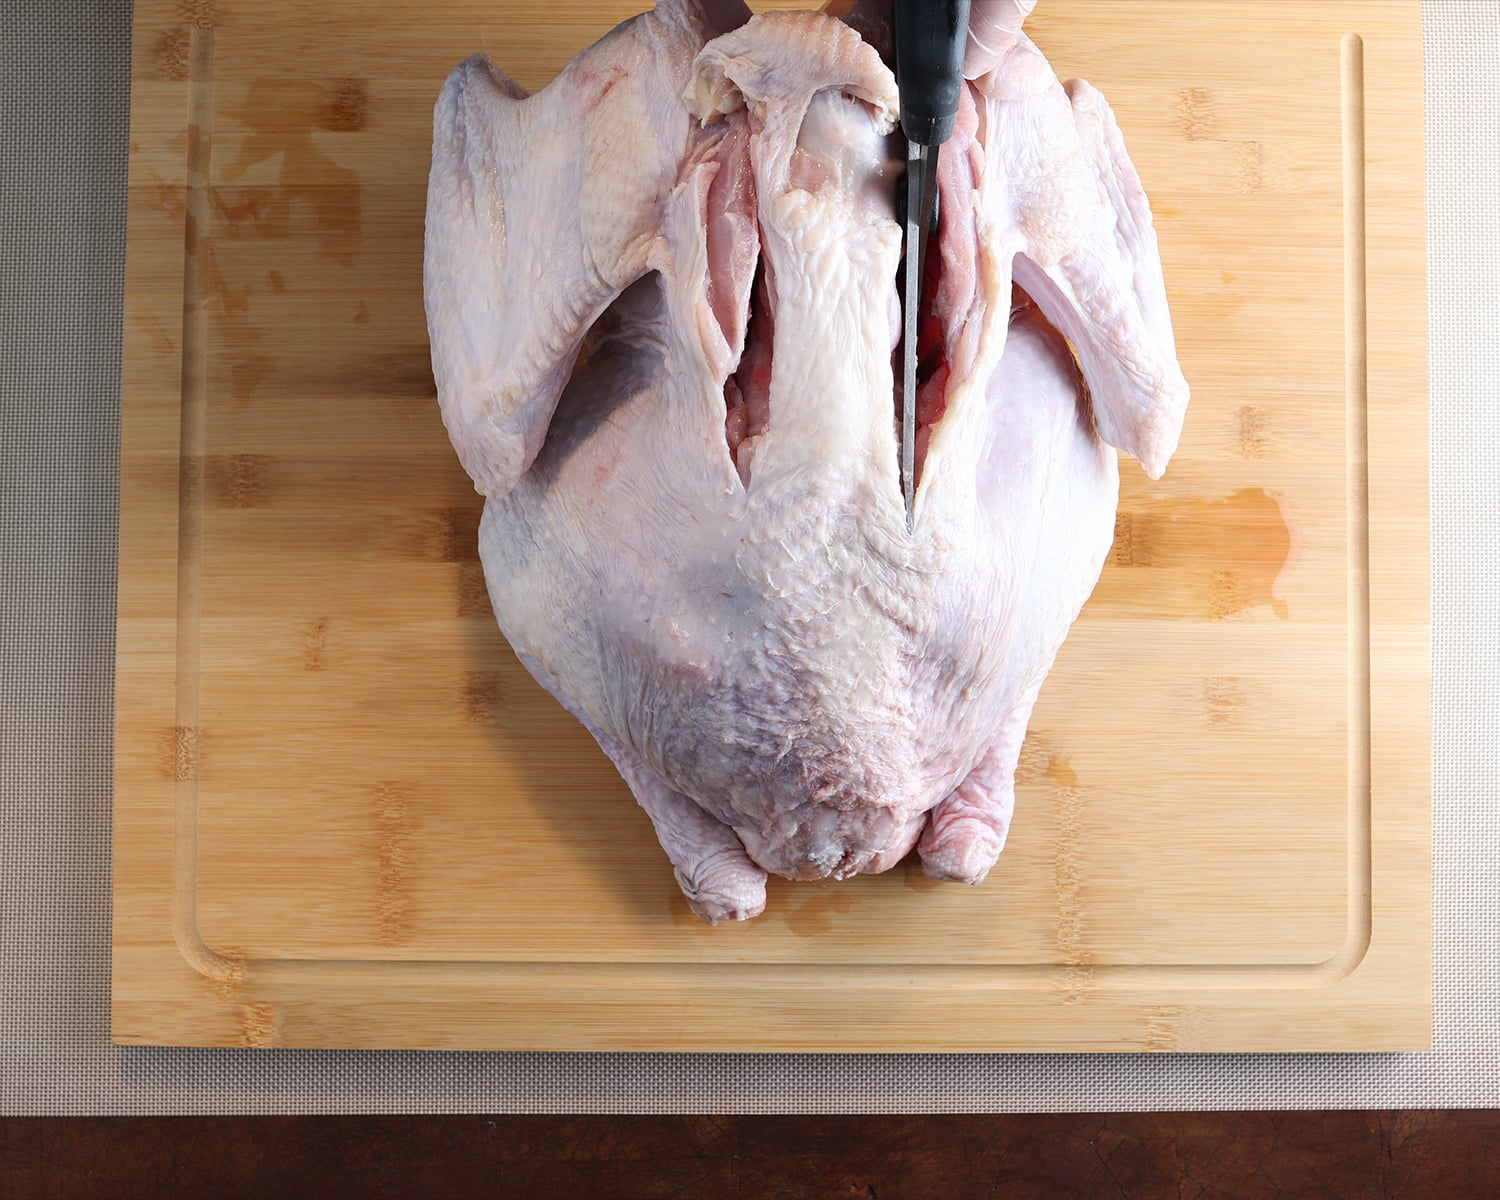
2. Cut Along the Backbone: Locate the backbone running down the center of the turkey. Beginning at the tail end, use heavy-duty poultry shears to cut along one side of the backbone, keeping the blades close to the bone. Work slowly through the ribs, keeping your fingers clear of the shears.
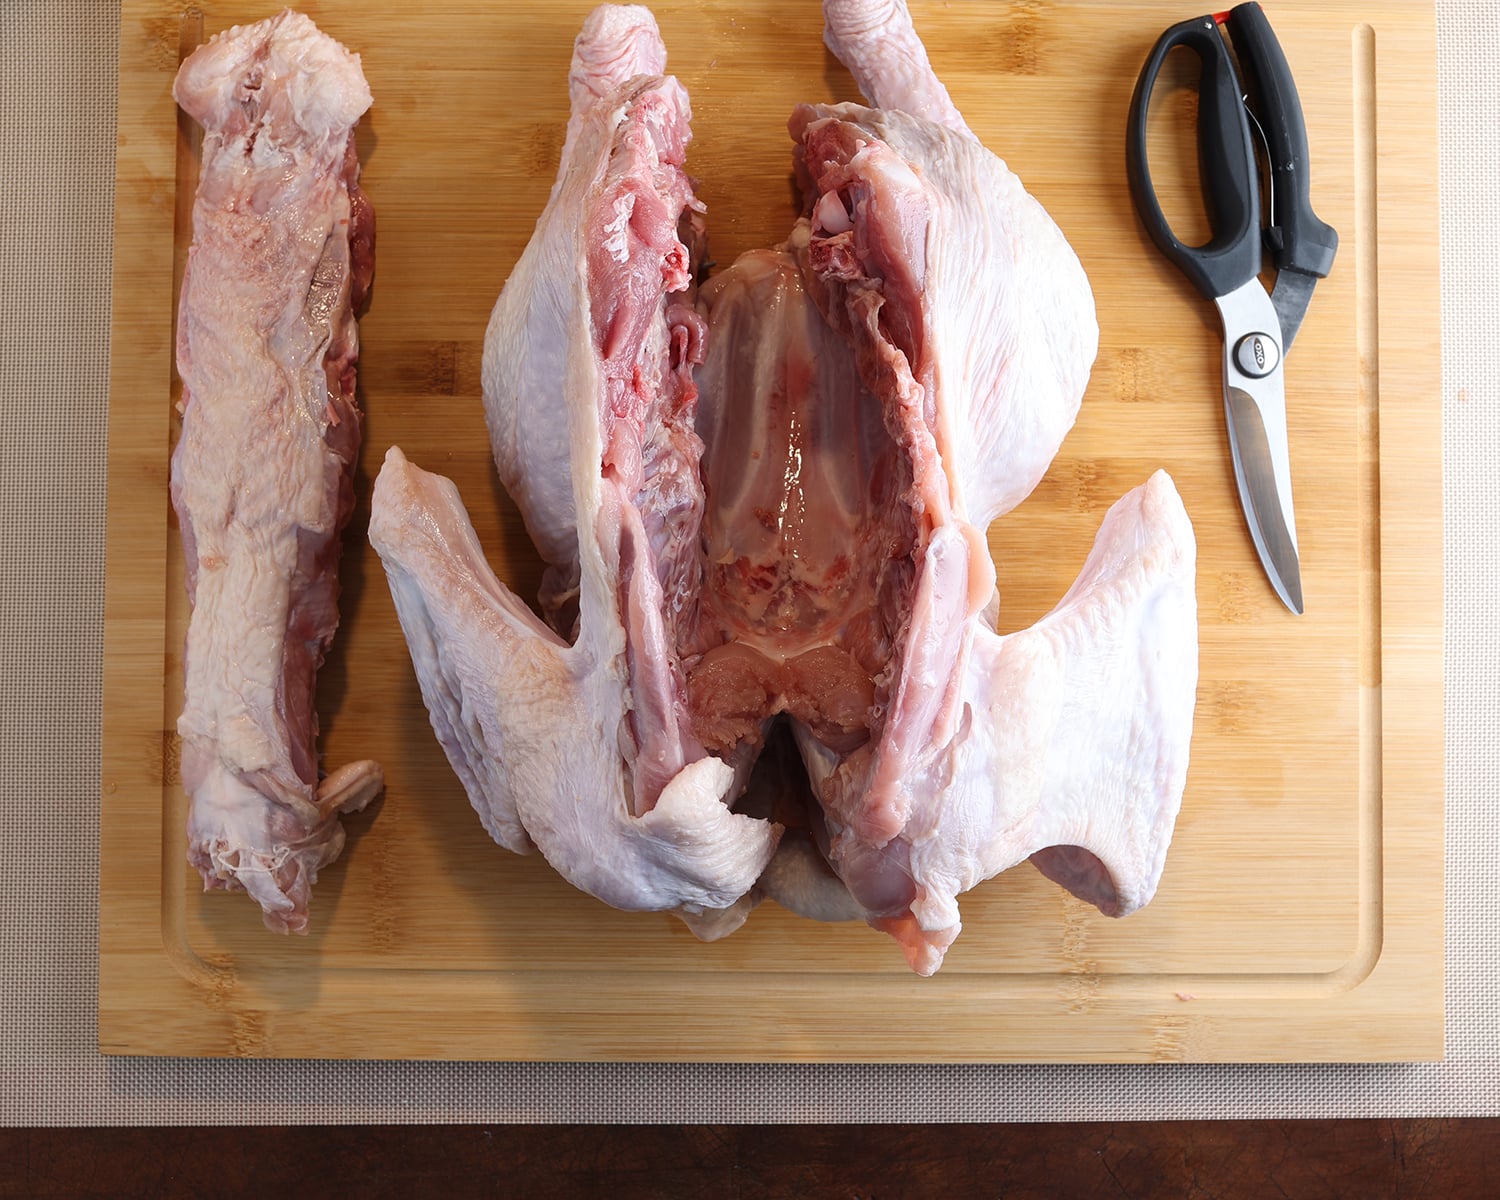
3. Remove the Backbone: Rotate the turkey 180 degrees and repeat the cut along the opposite side of the backbone. Remove the backbone completely. Save it, along with the neck, to make homemade turkey stock or gravy.
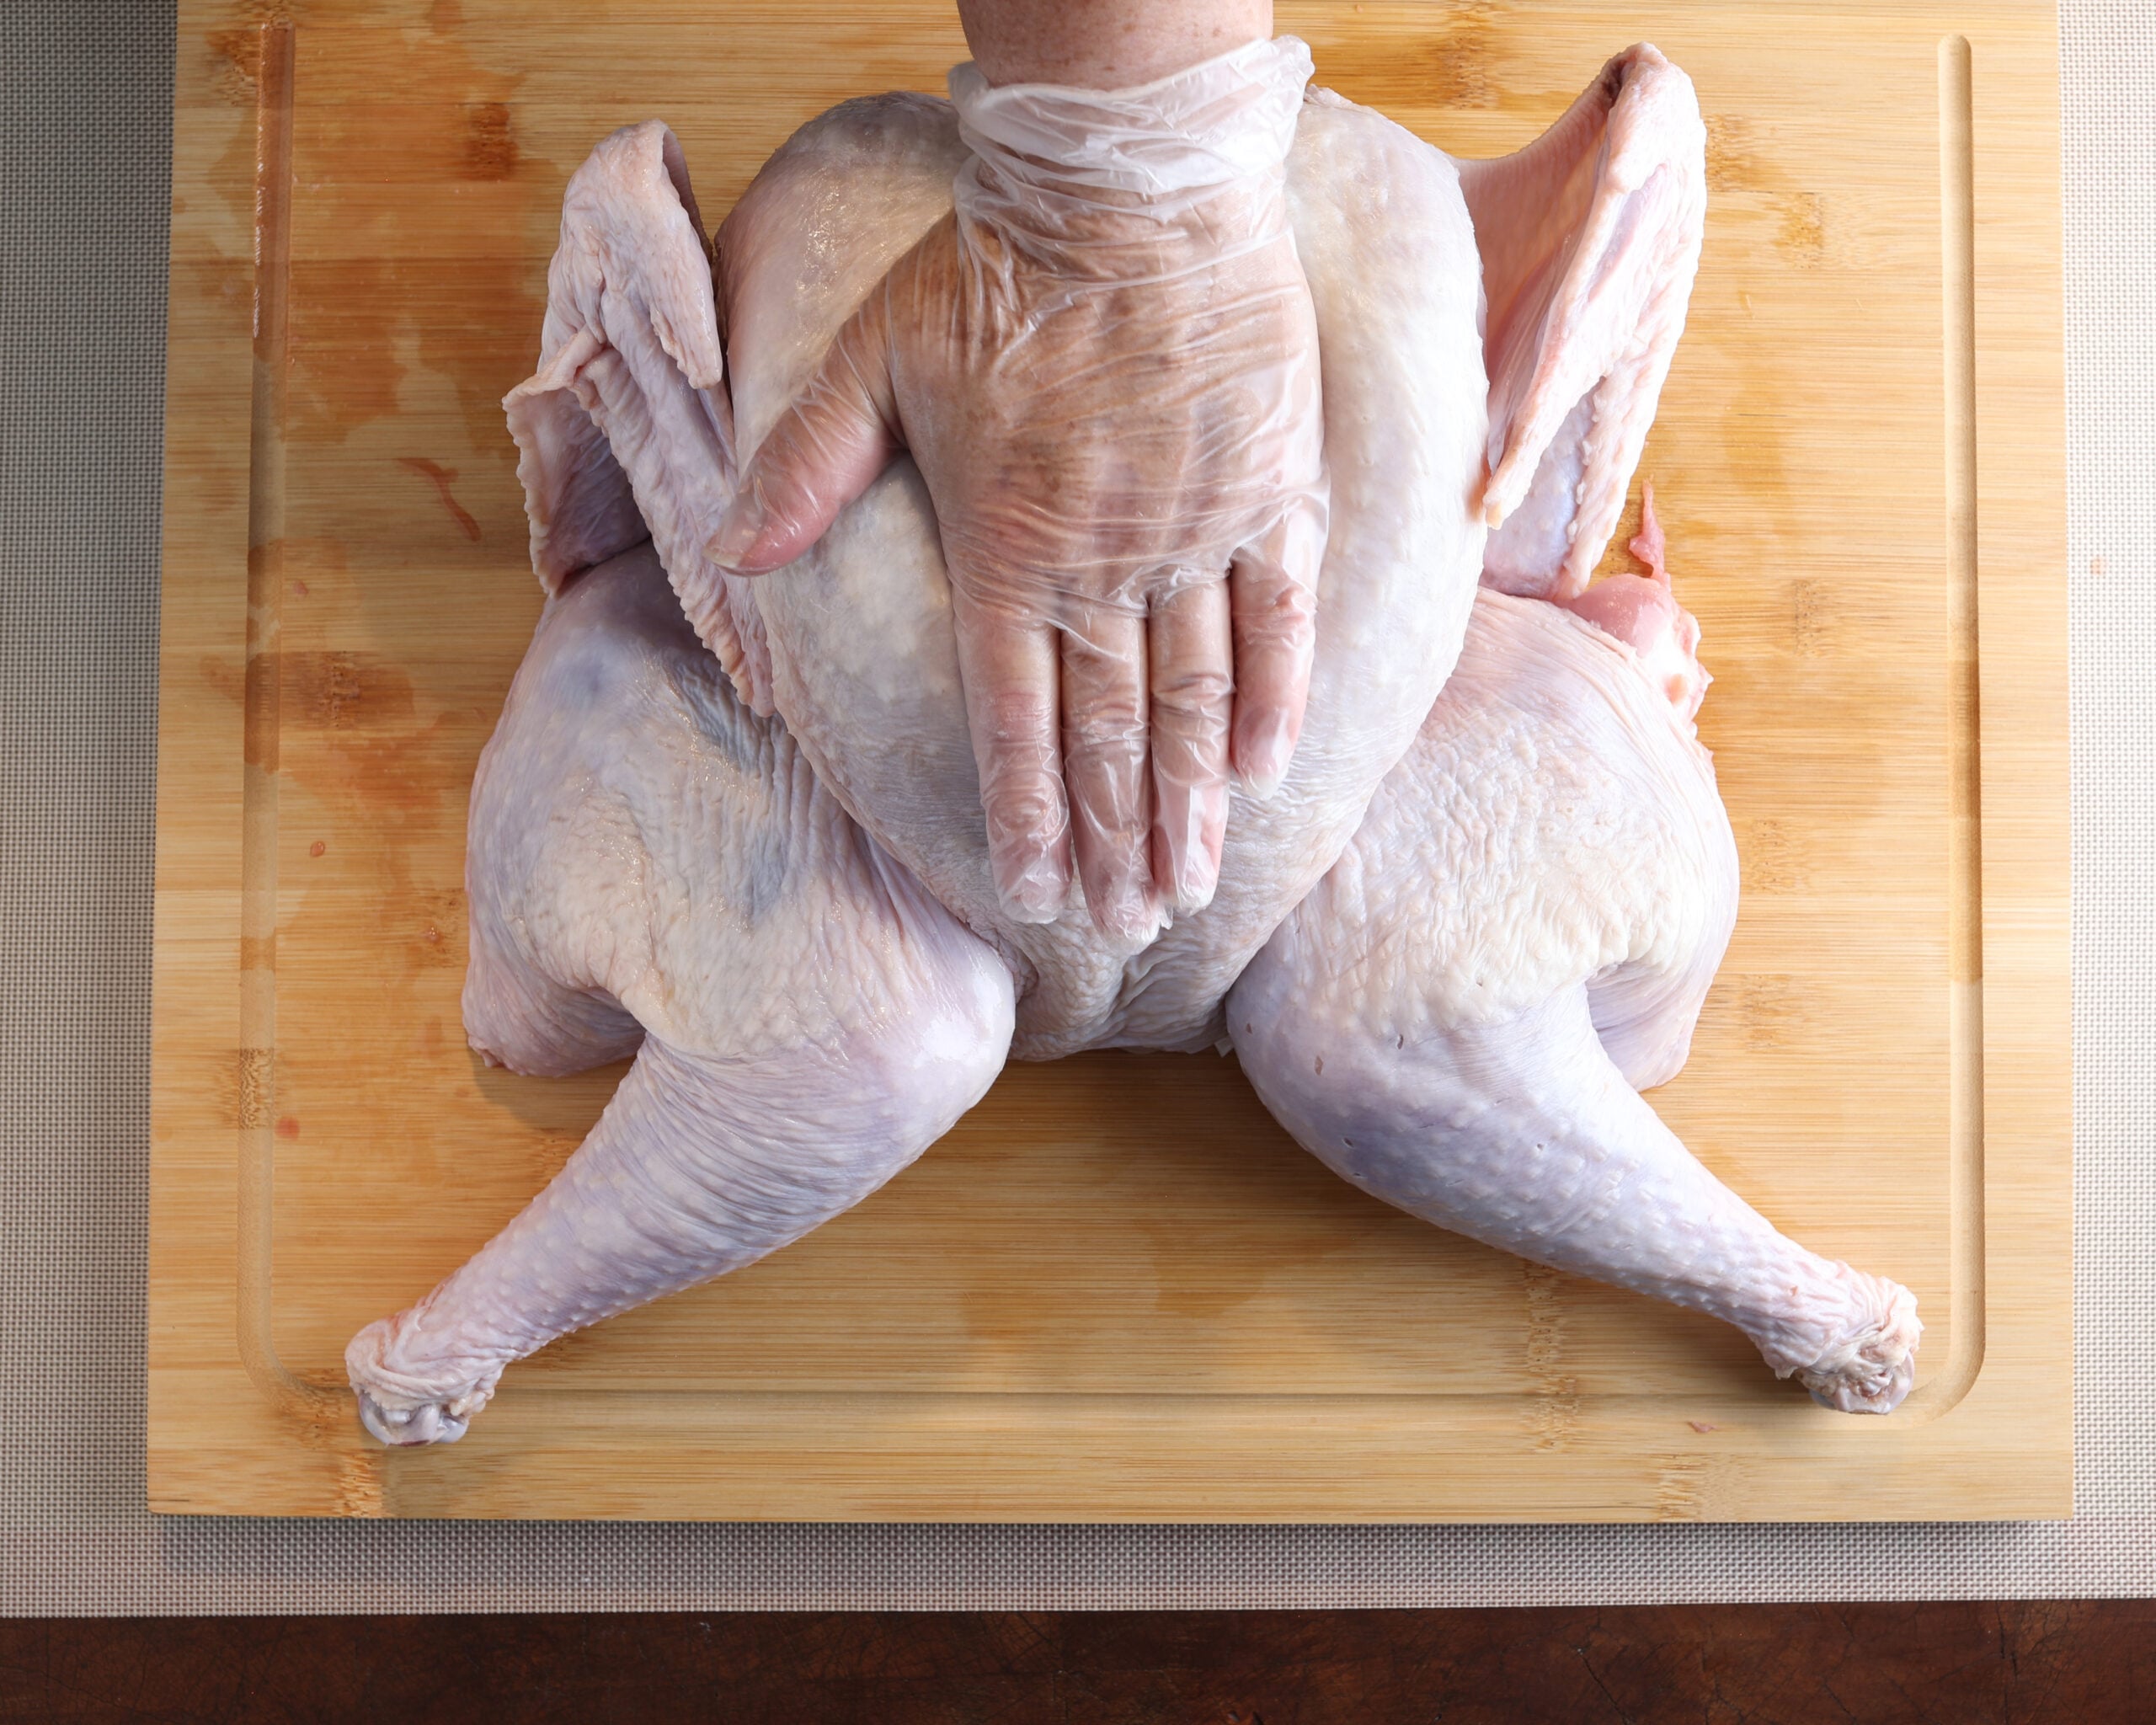
4. Flatten the Turkey: Turn the turkey breast-side up. Place both hands firmly over the center of the breastbone and press downward until you hear a crack and the bird lies as flat as possible. Transfer to bake sheet with a wire rack and tuck the wingtips beneath the breasts to help prevent burning during roasting.
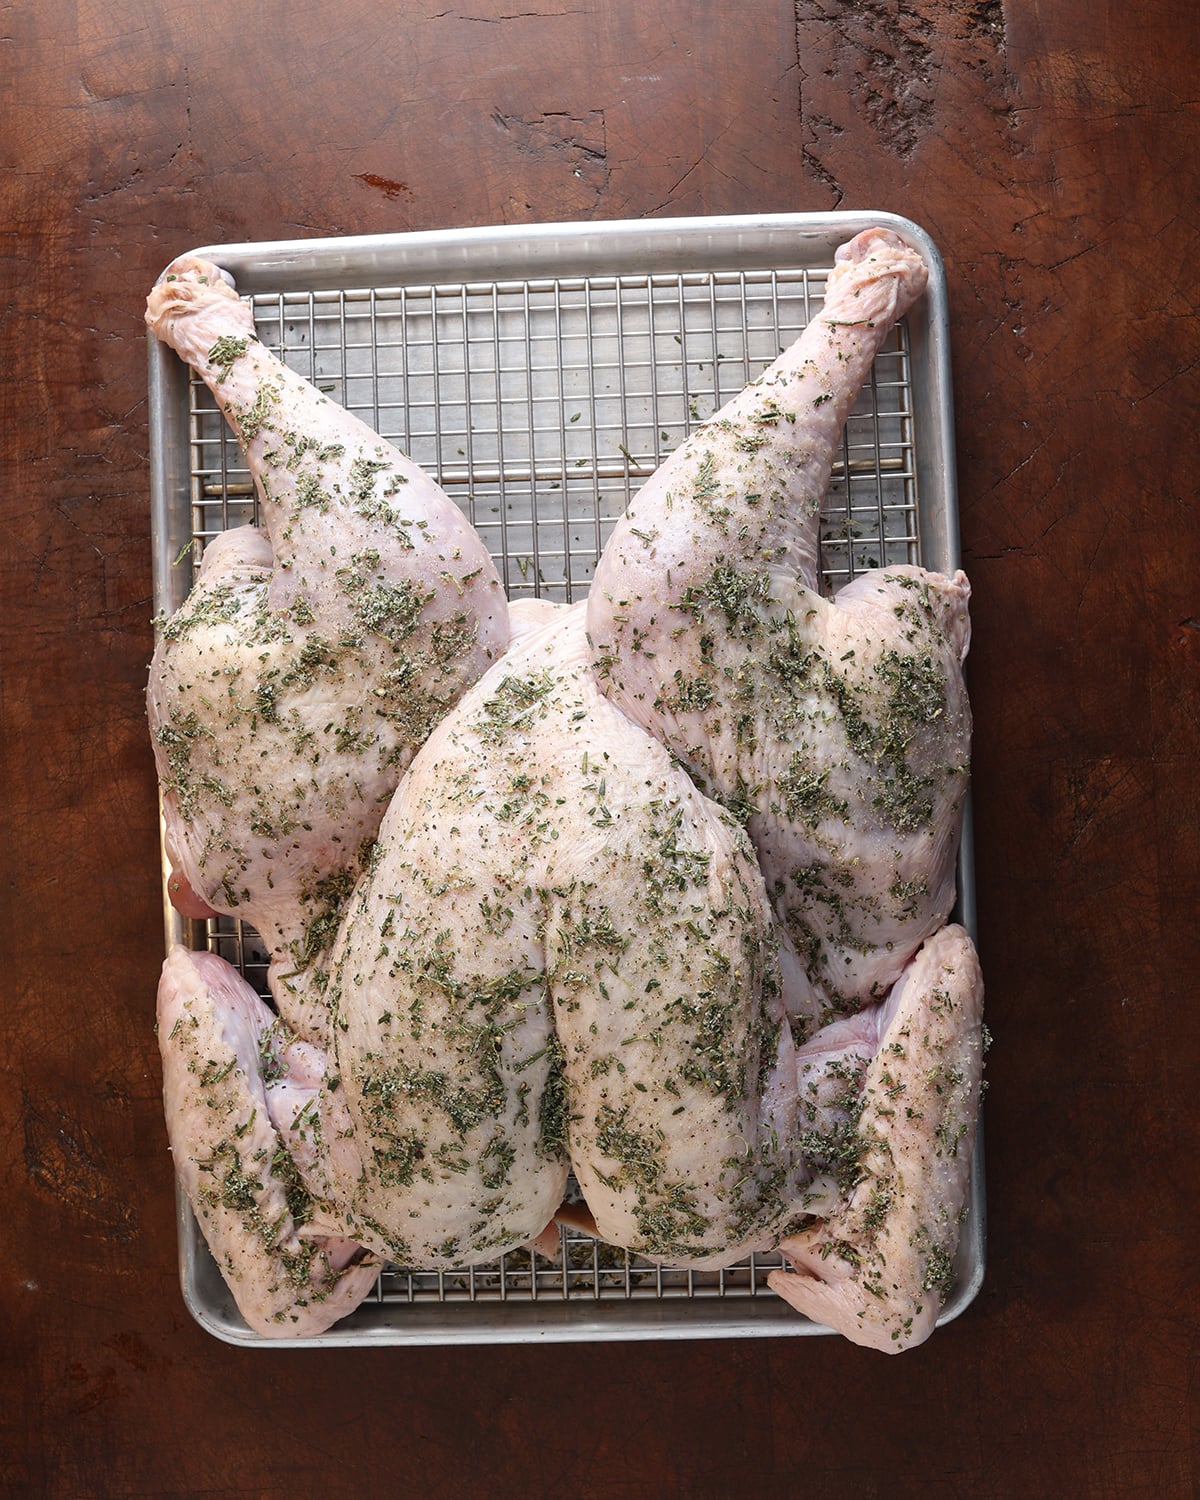
5. Season the Turkey: Place the flattened turkey breast-side up on a wire rack inside a rimmed baking sheet, ensuring the bird fits entirely within the pan. Combine the kosher salt, black pepper, rosemary, thyme, and sage in a small bowl. Rub the seasoning evenly over the turkey, including beneath the wings and around the legs.
6. Refrigerate Overnight: Refrigerate the turkey uncovered for 12 to 24 hours on the bottom shelf of your refrigerator. This dry-brining process seasons the meat while allowing surface moisture to evaporate for crispier skin. Keep the turkey away from ready-to-eat foods.
7. Roast the Turkey: Preheat your oven to 450°F (232°C). Transfer the turkey directly from the refrigerator to the preheated oven. Begin checking the internal temperature after approximately 60 minutes. A 12 - 14-pound spatchcocked turkey may take roughly 1¼ to 1¾ hours, depending on the oven and bird. Roast until the thickest part of the breast, innermost thigh, and innermost wing each reach at least 165°F (74°C). Avoid touching bone when checking the temperature. For more tender dark meat, the thighs may be cooked to 170°F to 175°F (77°C to 79°C), provided the breast does not overcook. If the skin browns too quickly, reduce the oven temperature.
8. Rest, Carve, and Enjoy: Remove the turkey from the oven and let it rest for 15 to 20 minutes before carving. Begin by removing the legs and thighs, followed by the wings and breasts. Arrange everything on a serving platter and enjoy your beautifully roasted turkey.
Expertise From My Kitchen: The Secret to Crispy Turkey Skin
Crispy turkey skin takes more than a hot oven. One of the best techniques is surprisingly simple: season your turkey with salt and let it rest uncovered in the refrigerator overnight. This process is called dry brining.
First, the Salt Works Its Magic
When salt touches the turkey, it draws moisture to the surface. That moisture dissolves the salt, creating a concentrated brine that gradually moves back into the meat.
As the turkey rests, the salt helps the muscle proteins retain moisture during roasting, giving you more flavorful, juicy meat.
Next, Let the Skin Dry
Here's where the magic happens! While the salt seasons the meat, the uncovered turkey skin slowly dries in the refrigerator.
Why does this matter? Moisture is the enemy of crispy skin. Before the skin can brown, the oven must evaporate excess surface moisture. The drier the skin, the sooner beautiful browning can begin.
Finally, Let the Oven Do Its Job
When the turkey enters the hot oven, the dry skin browns and crisps while the seasoned meat roasts beneath it.
The reward? Beautifully golden, crispy skin with tender, juicy meat inside.
My Kitchen Tip: Don't cover your turkey with plastic wrap during dry brining. Allow air to circulate around the bird, and always keep it refrigerated at 40°F (4°C) or below.
Look at You, You've Mastered a New Kitchen Skill!
Spatchcocking is one of those kitchen techniques that looks more complicated than it really is. Once you understand how removing the backbone changes the way a bird cooks, you'll have a useful skill for roasting everything from a holiday turkey to a simple Sunday chicken.
And don't forget to save that backbone. There's a beautiful batch of homemade stock waiting to happen.

Featured Farmer: Argyle Acres
Sometimes the people behind our food cross our paths in the most unexpected places. I first met the Argyle family in Washington, D.C., when Argyle Acres and my bakery, RubySnap, were among 20 Utah food businesses invited to represent our state's food producers.
Chris and Amanda Argyle began their farming journey with an old farmhouse, a desire to grow better food for their family, and a willingness to learn. Today, their farm in Utah's beautiful Ogden Valley raises pasture-raised livestock, including Thanksgiving turkeys.
Their birds are moved regularly to fresh pasture, giving them room to forage while supporting the health of the land.
I love that our paths first crossed so far from home, brought together by a shared connection to Utah's food community. Now I get to introduce their farm to you, too! Learn more about Argyle Acres.

The Recipes That Return to My Table Every Year
Every Thanksgiving, I find myself doing the same little dance around the kitchen. The potatoes are bubbling, the casseroles are waiting for their turn in the oven, and somehow, there's never quite enough counter space. But I wouldn't have it any other way.
I love how the harvest comes together on a Thanksgiving table. Sweet potatoes, winter squash, green beans, and buttery dinner rolls, each bringing something wonderful to the meal.
These are the dishes that have earned their place at my table, year after year:
- Sweet Potato Soufflé
- Delicata Squash Casserole
- French Onion Green Bean Casserole
- Herbed Roasted Sweet Potatoes
- Hawaiian Dinner Rolls
- Mashed Potatoes
By the time everyone gathers around the table, I hope they're hungry, because there's always more food than we need. And that's part of the joy of it, good food, familiar faces, and enough leftovers to enjoy it all over again tomorrow.
Thank you for celebrating the harvest with me today.
Frequently Asked Questions About Spatchcocking a Turkey
Can I Spatchcock a Turkey the Day Before Cooking?
Absolutely! In fact, I recommend it. Spatchcock and season your turkey the day before roasting, then refrigerate uncovered overnight. Just remember to cook it within 1 to 2 days after it has completely thawed in the refrigerator.
Can I Spatchcock a Partially Frozen Turkey?
No. The turkey should be completely thawed before attempting to remove the backbone. Frozen sections make cutting difficult and increase the risk of your shears slipping.
What If I Forget to Thaw My Turkey?
The USDA permits cold-water thawing when you're short on time.
Keep the turkey in leakproof packaging, submerge it in cold water, and change the water every 30 minutes. Allow approximately 30 minutes per pound.
For a 12 to 14-pound turkey, plan on approximately 6 to 7 hours.
Important: A turkey thawed using the cold-water method must be cooked immediately after thawing. Skip the overnight dry brine if using this method.
Should I Rinse My Turkey Before Spatchcocking?
No. The USDA recommends against washing raw poultry because splashing water can spread bacteria around your kitchen. Simply pat the turkey dry with paper towels.
How Do I Know When My Turkey Is Done?
The most reliable method is a meat thermometer. Check the thickest part of the breast, innermost thigh, and innermost wing without touching bone.
All three areas must reach at least 165°F (74°C).
Cooking times are estimates. Temperature is what determines doneness.
Can I Use This Technique for Chicken or Cornish Game Hens?
Yes! Spatchcocking works beautifully for whole chickens and Cornish game hens. The same basic cutting technique applies, although smaller birds require less force and generally cook much faster.
What Should I Do with the Turkey Backbone?
Don't throw it away! The backbone, neck, and other usable bones make a flavorful foundation for homemade turkey stock, soup, or gravy.
If you're not using them immediately, refrigerate promptly and cook within the safe raw-poultry storage period, or freeze for later.
How Long Can I Store Leftover Turkey?
Refrigerate cooked turkey within two hours of roasting. Remove the meat from the carcass and place it in shallow containers to cool quickly.
Cooked turkey will keep in the refrigerator for 3 to 4 days. Freeze any leftovers you won't use within that time.
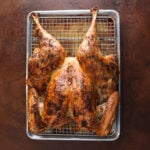
How To Spatchcock a Turkey: Easy Step-By-Step Guide
Equipment
- Heavy-duty poultry shears
- Large cutting board
- Half-size bun pan 18 × 13 inches (rimmed baking sheet) with oven-safe wire rack
- Instant-read meat thermometer
Ingredients
- 1 whole turkey (5.4 to 6.4 kg) completely thawed, 12 to 14 pounds
- 2 tablespoons kosher salt (24 g)
- 2 teaspoons coarsely ground black pepper (5 g)
- 1 tablespoon fresh rosemary (3 g) minced
- 1 tablespoon fresh thyme (3 g) minced
- 1 tablespoon fresh sage (3 g) minced
Instructions
- Prepare the Turkey: Remove the packaging, neck, and giblets from the completely thawed turkey. Pat the bird dry with paper towels and place it breast-side down on a large, stable cutting board. Position a damp towel or silpat mat beneath the board to prevent slipping.1 whole turkey
- Cut Along the Backbone: Locate the backbone running down the center of the turkey. Beginning at the tail end, use heavy-duty poultry shears to cut along one side of the backbone, keeping the blades close to the bone. Work slowly through the ribs, keeping your fingers clear of the shears.
- Remove the Backbone: Rotate the turkey 180 degrees and repeat the cut along the opposite side of the backbone. Remove the backbone completely. Save it, along with the neck, to make homemade turkey stock or gravy.
- Flatten the Turkey: Turn the turkey breast-side up. Place both hands firmly over the center of the breastbone and press downward until you hear a crack and the bird lies as flat as possible. Transfer to bake sheet with a wire rack and tuck the wingtips beneath the breasts to help prevent burning during roasting.
- Season the Turkey: Place the flattened turkey breast-side up on a wire rack inside a rimmed baking sheet, ensuring the bird fits entirely within the pan. Combine the kosher salt, black pepper, rosemary, thyme, and sage in a small bowl. Rub the seasoning evenly over the turkey, including beneath the wings and around the legs.2 tablespoons kosher salt, 2 teaspoons coarsely ground black pepper, 1 tablespoon fresh rosemary, 1 tablespoon fresh thyme, 1 tablespoon fresh sage
- Refrigerate Overnight: Refrigerate the turkey uncovered for 12 to 24 hours on the bottom shelf of your refrigerator. This dry-brining process seasons the meat while allowing surface moisture to evaporate for crispier skin. Keep the turkey away from ready-to-eat foods.
- Roast the Turkey: Preheat your oven to 450°F (232°C). Transfer the turkey directly from the refrigerator to the preheated oven. Begin checking the internal temperature after approximately 60 minutes. A 12 to 14-pound spatchcocked turkey may take roughly 1¼ to 1¾ hours, depending on the oven and bird. Roast until the thickest part of the breast, innermost thigh, and innermost wing each reach at least 165°F (74°C). Avoid touching bone when checking the temperature. For more tender dark meat, the thighs may be cooked to 170°F to 175°F (77°C to 79°C), provided the breast does not overcook. If the skin browns too quickly, reduce the oven temperature.
- Rest, Carve, and Enjoy: Remove the turkey from the oven and let it rest for 15 to 20 minutes before carving. Begin by removing the legs and thighs, followed by the wings and breasts. Arrange everything on a serving platter and enjoy your beautifully roasted turkey.
Notes
- Servings: 6 adults + 4 children
- Serving Size: Approximately 6 oz cooked turkey (170 g)
- Yields: 1 whole spatchcocked turkey, 12 to 14 pounds (5.4 to 6.4 kg), before cooking

Nutrition
DIETARY CONSIDERATIONS
The dietary categories below are provided as a quick reference to help you determine whether this recipe may fit your dietary preferences. They are intended as a helpful guide, not as medical or nutritional advice. Individual ingredients and brands can vary, so always check product labels if you have food allergies, sensitivities, or specific dietary needs.
- DF (Dairy Free): YES, contains no dairy ingredients.
- EF (Egg Free): YES, contains no eggs.
- GF (Gluten-free): YES, naturally gluten-free when using an unenhanced turkey and pure seasonings.
- NF (Nut Free): YES, contains no nuts.
- PB (Plant Based): NO, turkey is an animal protein.
- SF (Sugar Free): YES, contains no added sugar and is naturally sugar-free.
- VE (Vegetarian): NO, contains poultry.
- VG (Vegan): NO, contains animal protein.
- Paleo: YES, made with whole, unprocessed ingredients.
- Keto: YES, naturally low in carbohydrates and rich in protein.
- Whole30: YES, provided the turkey contains no noncompliant additives or injected solutions.

Leave a Reply