
Whether you're meal prepping for the week or adding bacon to soups, salads, pasta, casseroles, or baked potatoes, this simple oven method delivers beautifully caramelized bacon pieces with tender, chewy centers and lightly crisp edges every time. Baking chopped bacon in the oven cooks it evenly, frees up your stovetop, and leaves you with flavorful rendered bacon fat to use in future recipes. Once you learn this technique, you'll have a versatile kitchen staple ready to make everyday meals even more delicious.
Jump to Recipe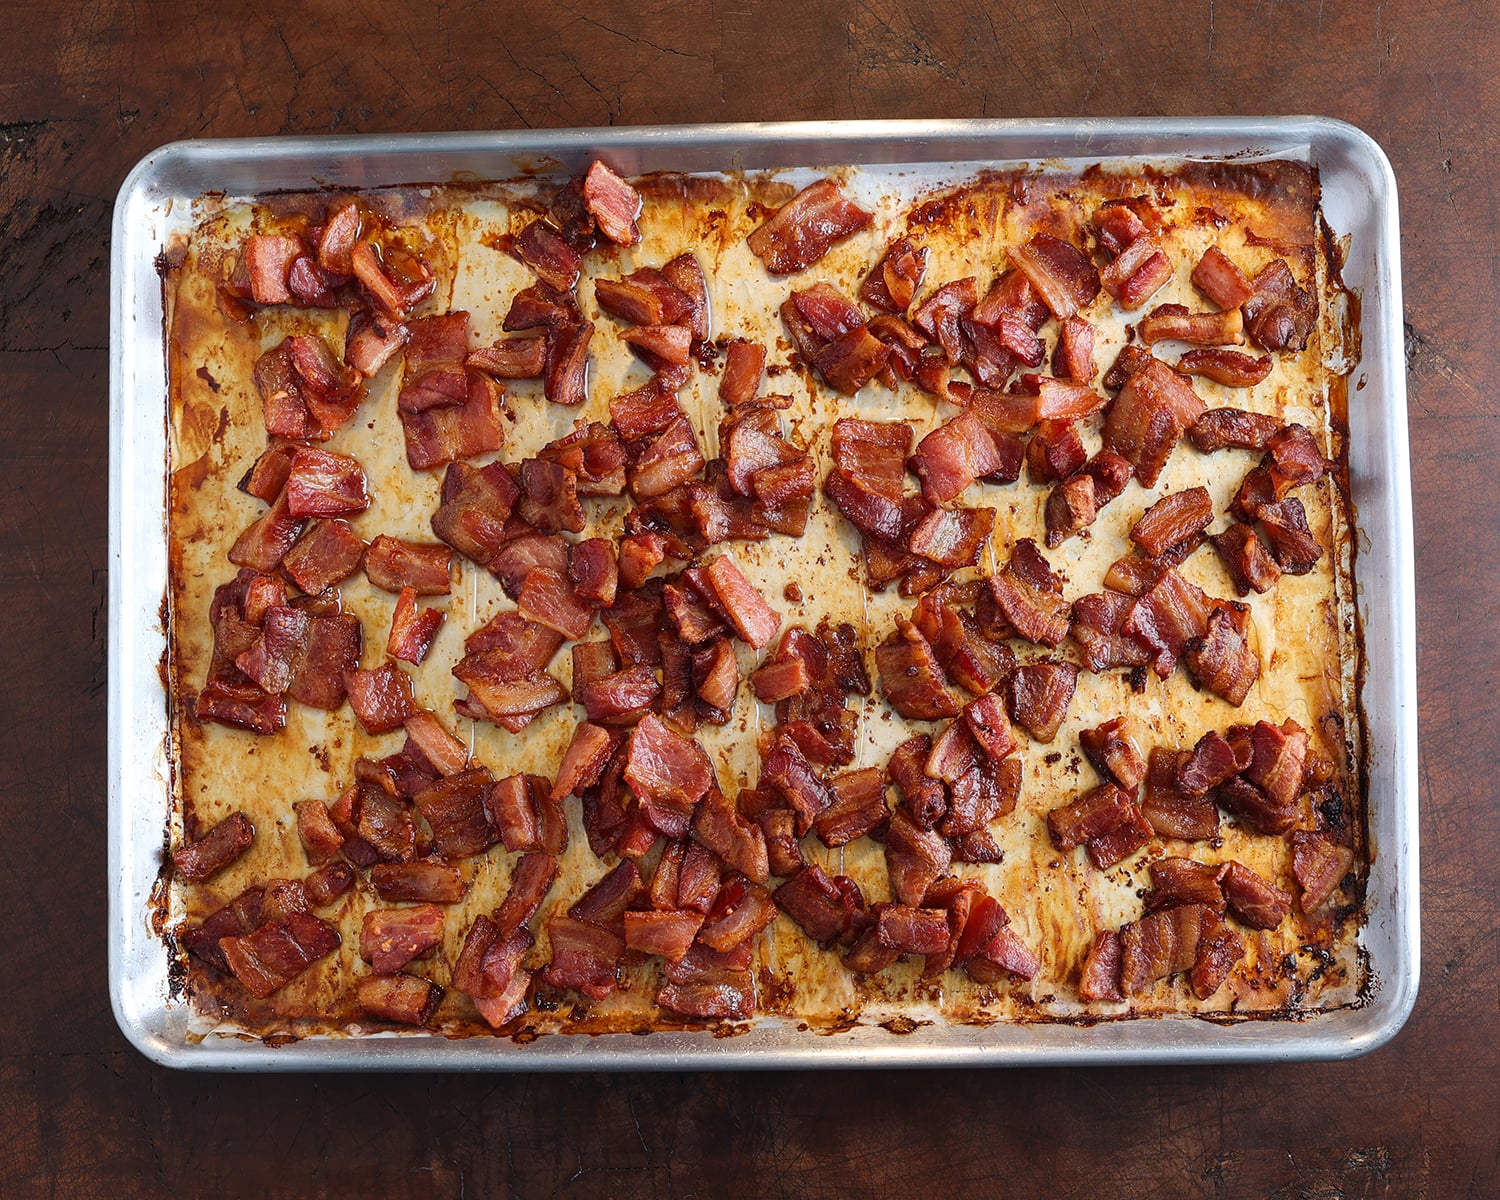
Why You'll Love This Method
- Rich caramelization. Baking at 400°F (204°C) develops deep, savory flavor while keeping the bacon beautifully tender.
- Hands-free cooking. Once the bacon is in the oven, you can prep the rest of your meal instead of standing over the stove.
- Easy cleanup. Parchment paper makes cleanup quick and helps keep your sheet pan looking great.
- Perfect for recipes. Evenly cooked bacon pieces blend beautifully into soups, salads, casseroles, pasta dishes, and baked potatoes.
- Bonus bacon fat. Save the rendered bacon fat to add incredible flavor to roasted vegetables, eggs, potatoes, and more.

Jump to:
- Why You'll Love This Method
- Why This Has Become My Go-To Method
- The Sweet Spot for Caramelized Bacon 400°F (204°C)
- Step-by-Step Instructions
- Bite Me Industries Kitchen Science
- How to Store Cooked Bacon Pieces
- Build Your Kitchen Confidence
- Frequently Asked Questions
- How To Cook Bacon Pieces in the Oven (Perfect for Recipes)
Why This Has Become My Go-To Method
As a professional recipe developer, my favorite bacon isn't shatteringly crisp. I prefer bacon that's soft, bendable, chewy, and deeply caramelized. That texture delivers richer flavor and stays tender when folded into recipes.
Many recipes aim for ultra-crispy bacon, but I've found that slightly chewy bacon pieces integrate more naturally into salads, soups, pasta dishes, and casseroles. They also hold their texture better after refrigeration, making them ideal for meal prep and make-ahead recipes.
The Sweet Spot for Caramelized Bacon 400°F (204°C)
After testing several oven temperatures, 400°F (204°C) has become my preferred method for cooking bacon pieces used in recipes. It strikes the ideal balance between rendering flavorful bacon fat and developing rich caramelization without overcooking the meat.
Here's why I reach for 400°F every time:
- Faster cooking: Finishes about 8 to 12 minutes sooner than baking at 375°F (190°C).
- Excellent fat rendering: Produces plenty of flavorful bacon fat for future cooking.
- Better caramelization: The bacon develops deeper color and richer flavor while remaining tender.
- Tender texture: The pieces stay pleasantly chewy with lightly crisp edges instead of becoming dry or brittle.
- Weeknight friendly: A shorter cook time means less waiting while still delivering consistently delicious results.
Step-by-Step Instructions
Before You Begin - Take a moment to read through the instructions before you begin. Baking chopped bacon in the oven cooks it more evenly than a skillet and frees up your stovetop for hands free cooking. This method creates beautifully caramelized bacon pieces with tender, chewy centers and lightly crisp edges, perfect for adding to your favorite recipes.
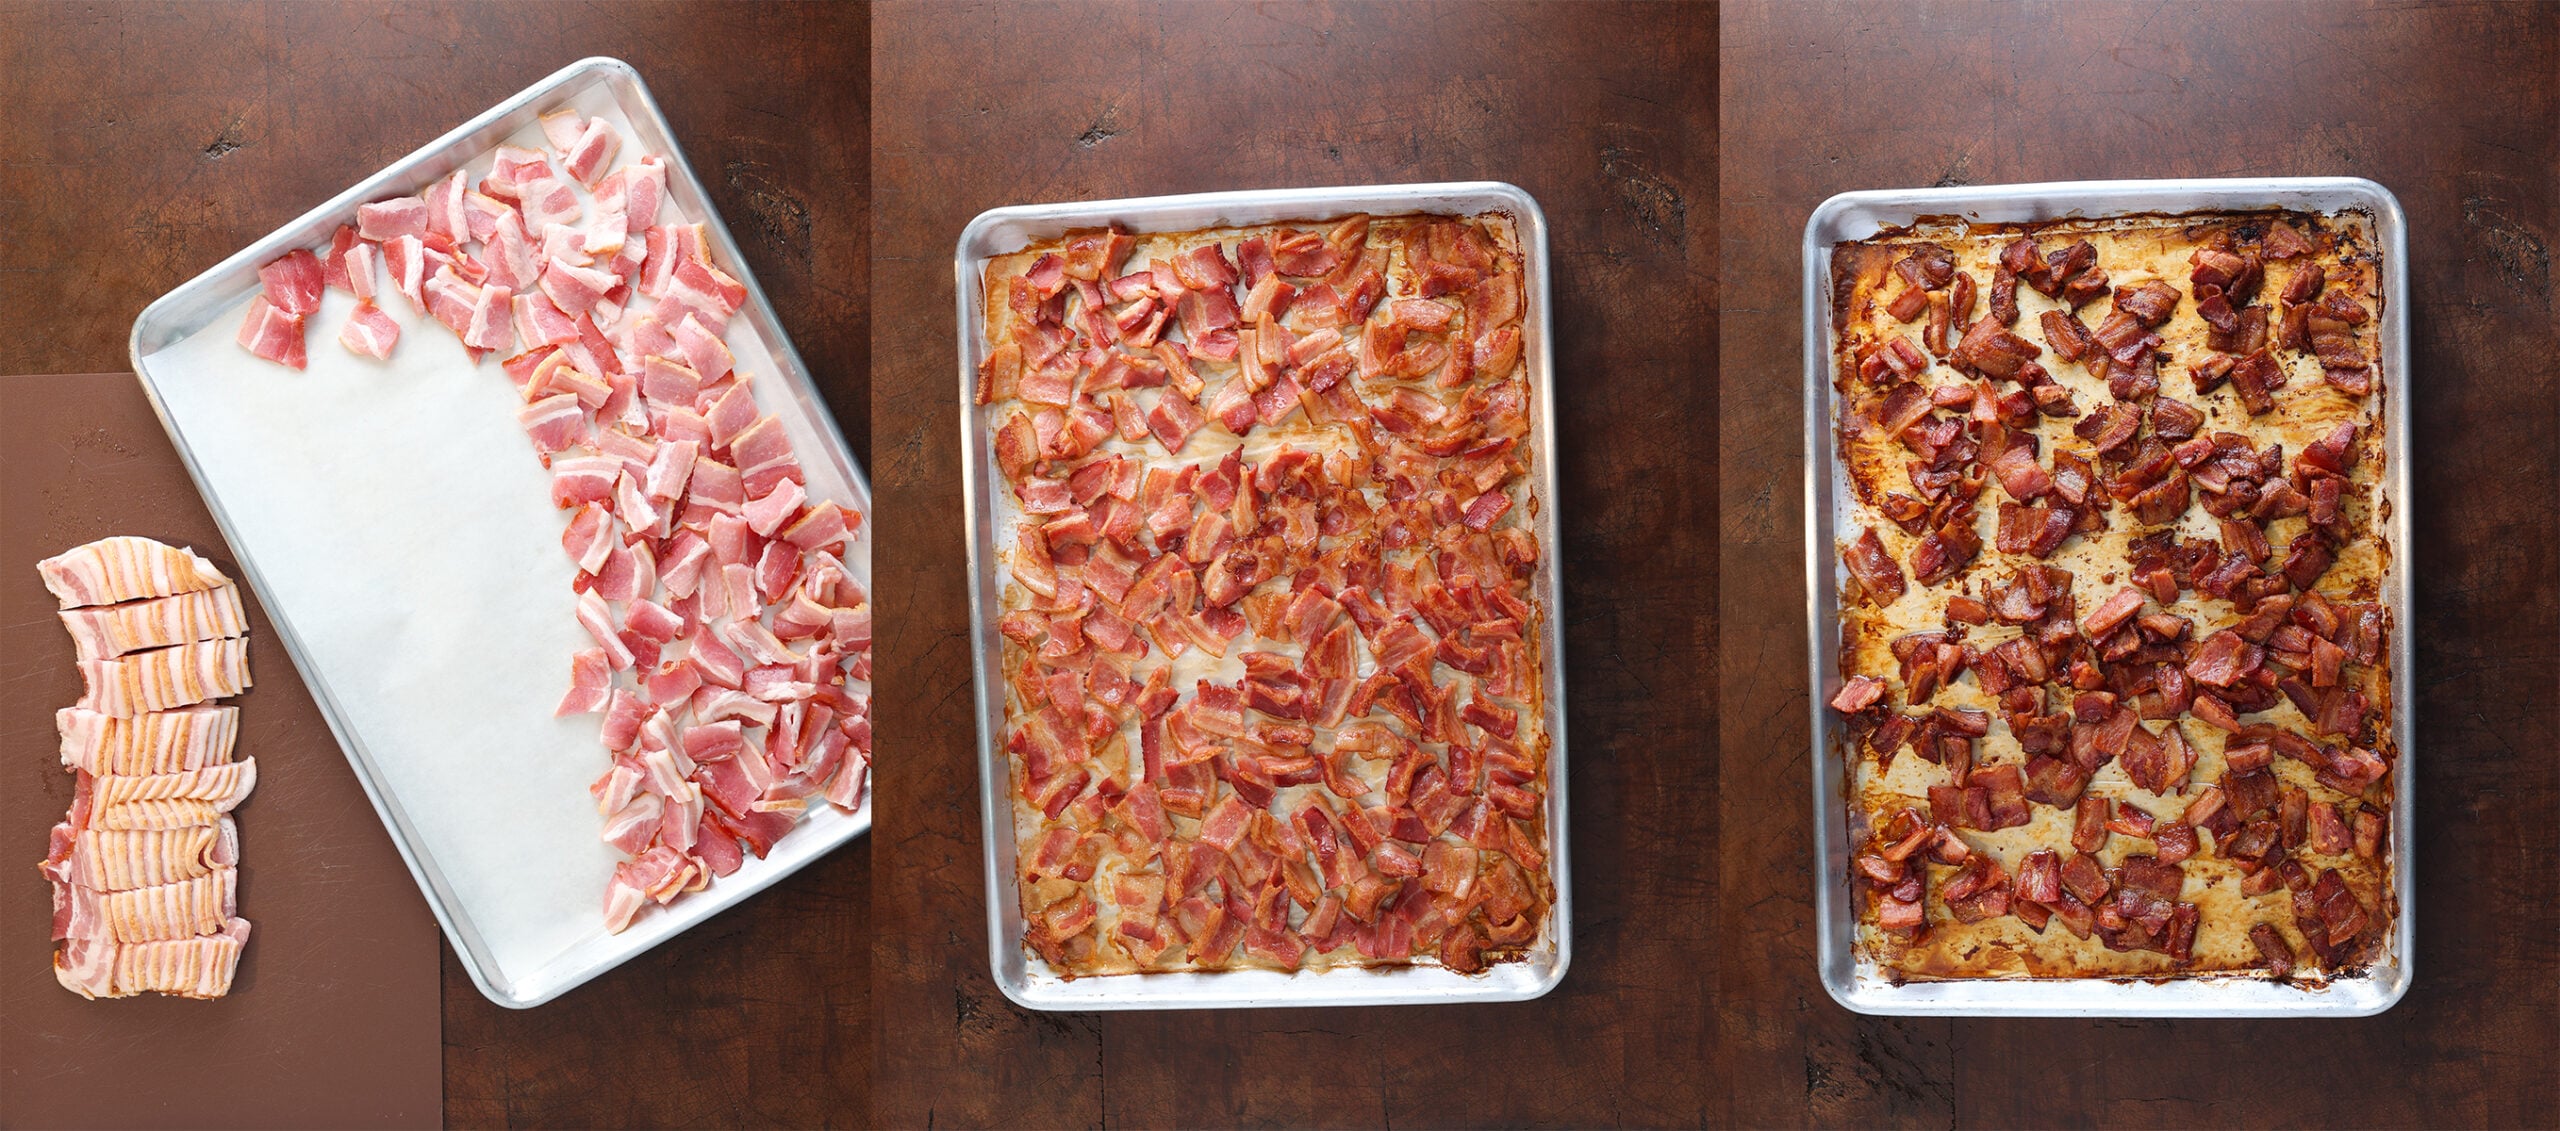
- Cut the Bacon: Using a sharp knife or kitchen shears, cut the bacon into approximately 1-inch (2.5 cm) pieces. Keeping the pieces a similar size helps them cook evenly and makes them easy to sprinkle into salads, soups, casseroles, baked potatoes, and other recipes.
- Prepare the Pan: Preheat the oven to 400°F (204°C). Line a large rimmed baking sheet with parchment paper. Spread the bacon pieces into a single, even layer. It's perfectly fine if some pieces touch, but avoid piling them on top of one another, which can trap steam and slow browning.
- Bake: Bake for 20 minutes, then use a spatula to stir and redistribute the bacon for even cooking. Continue baking for an additional 5 to 10 minutes, stirring every 5 minutes, until the bacon is deeply golden with lightly crisp edges while remaining soft, tender, and pleasantly chewy in the center. *Bake time will vary depending on oven and bacon fat content.
- Drain: Using a slotted spoon, transfer the cooked bacon to a paper towel-lined plate to absorb any excess grease.
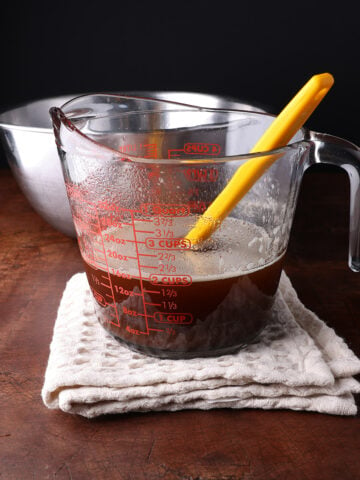
- Strain and Save the Bacon Fat: Don't let that flavorful bacon fat go to waste. Allow the rendered fat to cool for a few minutes, then carefully strain it through a fine-mesh sieve or cheesecloth into a clean glass jar to remove any browned bits. Store it in the refrigerator for up to 3 months or freeze for longer storage. Use it to make vinaigrettes, roast vegetables, fry potatoes or eggs, sauté vegetables, or add rich, smoky flavor to biscuits, cornbread, and other savory recipes.
Bite Me Recipe Tips: If you'd like to save the rendered bacon fat, allow it to cool for a few minutes, then carefully strain it through a fine-mesh sieve or cheesecloth into a clean glass jar. Refrigerate for up to 3 months or freeze for longer storage.
Bite Me Industries Kitchen Science
Bacon develops its best flavor as its natural sugars and proteins caramelize during cooking. Removing it while the center is still tender preserves that rich, savory flavor and creates pleasantly chewy pieces that blend beautifully into salads, soups, pasta dishes, and casseroles. Cooking bacon until it's very crunchy drives off more moisture and can mute some of its naturally sweet, smoky character.
Why I Bake Bacon at 400°F (204°C)
After testing different oven temperatures, 400°F (204°C) has become my preferred method for cooking bacon pieces used in recipes. It strikes the perfect balance between rich caramelization, flavorful rendered bacon fat, and a tender, chewy texture.
Here's why I recommend it:
- Beautiful caramelization. The bacon develops deeper color and richer flavor without drying out.
- Plenty of rendered bacon fat. You still collect flavorful bacon grease for future cooking while achieving better browning.
- Tender, chewy texture. The pieces remain soft and flavorful with lightly crisp edges, making them ideal for salads, soups, pasta dishes, casseroles, and baked potatoes.
- Reliable results. It delivers consistent, evenly cooked bacon without requiring constant attention.
Where to Use Oven Baked Bacon Pieces
Cook once, enjoy all week. A batch of oven baked bacon pieces adds incredible flavor to meals all week long, making quick lunches, easy dinners, and weekend breakfasts feel just a little more special.
I love opening the refrigerator and knowing there's a container of oven cooked bacon ready to make almost any meal better. So here’s a few…. Sprinkle it over my BLT Corn Salad with Warm Bacon Shallot Vinaigrette, stir it into a comforting bowl of Creamy Sweet Potato Bacon Chowder, or tuck it into Bacon and Gruyère Egg Bites for an easy breakfast. I also love adding it to my Creamy Clam Chowder Soup, piling it onto Spring Pea Toast with Herbed Goat Cheese & Bacon, or finishing my Dodo Dinner Salad with Honey Lemon Bacon Dressing with a generous handful. Once you've mastered this technique, you'll start noticing just how many meals a container of cooked bacon can improve.

How to Store Cooked Bacon Pieces
Cooked bacon is one of my favorite meal prep ingredients because it keeps well and is ready whenever you need it. Store it properly, and you'll have perfectly cooked bacon on hand for salads, soups, pasta dishes, baked potatoes, and quick breakfasts all week long.
Refrigerator: Allow the bacon to cool completely, then store it in an airtight container or zip-top bag lined with a paper towel. Refrigerate for 4 to 5 days.
Freezer: Freeze cooked bacon pieces in a freezer-safe container or freezer bag for up to 3 months. For the best texture, divide it into smaller portions so you can thaw only what you need.
To Reheat: Warm the bacon in a skillet over medium heat for 2 to 3 minutes or microwave it in 15 to 20 second intervals until heated through. If you're adding it to soups, casseroles, or pasta, simply stir it in during the final few minutes of cooking.
Use It Cold: One of my favorite ways to use cooked bacon is straight from the refrigerator. Sprinkle it over salads, grain bowls, wraps, or sandwiches without reheating.
Build Your Kitchen Confidence
Every kitchen skill you learn gives you another reason to cook with confidence. Whether you're mastering a simple technique or trying something completely new, these step-by-step guides are designed to help you become a more knowledgeable home cook, one recipe at a time.
Kitchen Basics
- How to Brown Butter – Learn how to transform ordinary butter into a rich, nutty ingredient that adds incredible depth to both sweet and savory recipes.
- How to Roast Beets – Roast beets until they're perfectly tender while preserving their naturally sweet, earthy flavor.
- How to Make Homemade Whole Milk Ricotta Cheese – Turn fresh whole milk into creamy homemade ricotta with just a few simple ingredients.
Equipment
- Rimmed baking sheet
- Parchment paper
- Sharp knife or kitchen shears
- Slotted spoon
- Fine-mesh sieve
- Glass storage jar
Frequently Asked Questions
Can I freeze cooked bacon?
Yes! Cooked bacon freezes beautifully for up to 3 months. Cool it completely before freezing, and portion it into smaller containers or freezer bags for quick meals.
Can I cook thick-cut bacon this way?
Absolutely. Thick-cut bacon works well, but it requires a longer baking time. Start checking it after 25 minutes and continue baking until it reaches your preferred texture.
Do I need parchment paper?
No, but I highly recommend it. Parchment paper prevents sticking, makes cleanup much easier, and helps protect your baking sheet from baked-on grease.
Can I use aluminum foil instead?
Yes. Foil works well and makes cleanup easy, although bacon may stick slightly more than it does on parchment paper.
Can I cook bacon from frozen?
Yes, although I recommend thawing it first if you plan to cut it into pieces. Frozen bacon is much harder to slice evenly, and consistent pieces cook more uniformly.
Why didn't my bacon brown?
Bacon that's crowded on the pan can steam instead of roast. For the best caramelization, spread the pieces into a single layer and stir them once or twice during baking.
Why did my bacon splatter?
As bacon cooks, moisture trapped inside the meat turns to steam, causing the rendered fat to pop. Using a rimmed baking sheet and baking the bacon in the oven greatly reduces splatter compared to cooking it in a skillet.
Can I use turkey bacon?
Yes, but expect different results. Turkey bacon contains much less fat than pork bacon, so it won't render bacon grease and won't develop the same rich caramelization.
Can I save the bacon fat?
Definitely. Strain the rendered bacon fat through a fine-mesh sieve or cheesecloth into a clean glass jar. Store it in the refrigerator for up to 3 months or freeze it for longer storage. It's wonderful for roasting vegetables, frying eggs or potatoes, making vinaigrettes, and adding smoky flavor to biscuits, cornbread, and other savory dishes.
Can I make bacon ahead of time for meal prep?
Yes. In fact, that's exactly how I use this method. I often bake a large batch at the beginning of the week so I can quickly add flavorful bacon to salads, soups, breakfasts, pasta dishes, and baked potatoes without cooking a fresh batch every time.

How To Cook Bacon Pieces in the Oven (Perfect for Recipes)
Ingredients
- 2 pounds bacon of chopped pieces
Instructions
- Before You Begin - Take a moment to read through the instructions before you begin. Baking chopped bacon in the oven cooks it more evenly than a skillet and frees up your stovetop for hands free cooking. This method creates beautifully caramelized bacon pieces with tender, chewy centers and lightly crisp edges, perfect for adding to your favorite recipes.
- Cut the Bacon: Using a sharp knife or kitchen shears, cut the bacon into approximately 1-inch (2.5 cm) pieces. Keeping the pieces a similar size helps them cook evenly and makes them easy to sprinkle into salads, soups, casseroles, baked potatoes, and other recipes.2 pounds bacon
- Prepare the Pan: Preheat the oven to 400°F (204°C). Line a large rimmed baking sheet with parchment paper. Spread the bacon pieces into a single, even layer. It's perfectly fine if some pieces touch, but avoid piling them on top of one another, which can trap steam and slow browning.
- Bake: Bake for 20 minutes, then use a spatula to stir and redistribute the bacon for even cooking. Continue baking for an additional 5 to 10 minutes, stirring every 5 minutes, until the bacon is deeply golden with lightly crisp edges while remaining soft, tender, and pleasantly chewy in the center. *Bake time will vary depending on oven and bacon fat content.
- Drain: Using a slotted spoon, transfer the cooked bacon to a paper towel-lined plate to absorb any excess grease.
- Strain and Save the Bacon Fat: Don't let that flavorful bacon fat go to waste. Allow the rendered fat to cool for a few minutes, then carefully strain it through a fine-mesh sieve or cheesecloth into a clean glass jar to remove any browned bits. Store it in the refrigerator for up to 3 months or freeze for longer storage. Use it to make vinaigrettes, roast vegetables, fry potatoes or eggs, sauté vegetables, or add rich, smoky flavor to biscuits, cornbread, and other savory recipes.
Notes


Leave a Reply