Fluffy, pillowy-soft, and deeply satisfying, this easy homemade pita bread is made with pantry staples and no complicated steps. Whether baked in the oven or cooked on the stovetop, you'll be rewarded with puffed, golden pockets perfect for dipping, stuffing, or snacking.
Jump to Recipe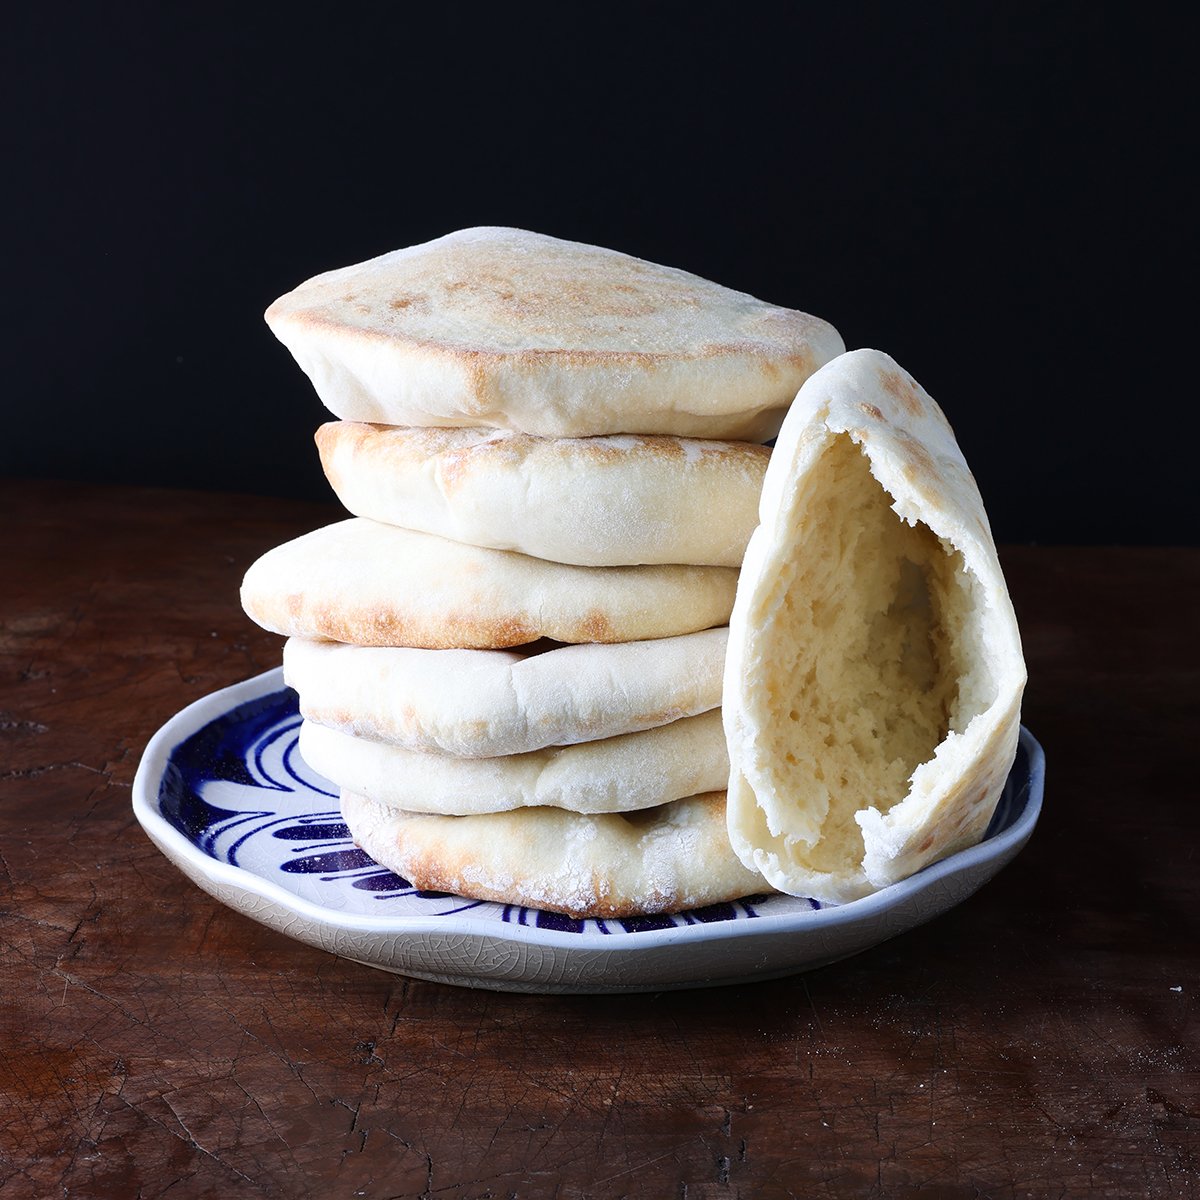
WHY YOU WILL LOVE THIS SOFT PITA BREAD RECIPE
This soft pita bread recipe delivers consistent, delicious results without needing a fancy oven setup or expert skills. With four easy cooking methods to choose from, you can enjoy freshly made pita no matter your kitchen setup.
Jump to:
- WHY YOU WILL LOVE THIS SOFT PITA BREAD RECIPE
- INGREDIENTS FOR EASY HOMEMADE PITA BREAD
- HOW TO MAKE EASY HOMEMADE PITA BREAD
- Endless Ways to Enjoy Easy Homemade Pita Bread
- The Dreamiest Way to Enjoy Pita? Hummus, of Course.
- Featured Farm - Meet Your Millers:
- EQUIPMENT NEEDED
- Easy Homemade Pita Bread
- DIETARY CONSIDERATIONS
INGREDIENTS FOR EASY HOMEMADE PITA BREAD
- Lukewarm Water - Provides hydration to activate the yeast and bind the dough; warm water helps jump-start the rising process.
- Instant Yeast - Speeds up the rising process and produces a light, airy texture without requiring a long fermentation.
- Sugar - Feeds the yeast to support fermentation and adds a touch of balance to the final flavor.
- Bread Flour - Provides high protein content, which supports gluten development for soft and elastic pitas.
- Salt - Enhances the overall flavor and regulates yeast activity for even proofing.
- Olive Oil - Adds softness to the dough and a subtle richness to the baked pita.

HOW TO MAKE EASY HOMEMADE PITA BREAD
Recipe Note: As with all bread or baking, I highly recommend using a kitchen scale for this soft pita bread recipe to weigh in metric grams. It is far more accurate, and you are more likely to achieve predictable success. Let’s get started.
- Activate the yeast: In a large bowl, mix lukewarm water, instant yeast, and sugar until combined.
- Add dry ingredients: Add flour and salt, then mix again until a rough dough forms.
- Knead the dough: Turn the dough out onto a lightly floured surface. Knead for 5–10 minutes until smooth and elastic. Or, bring together in a stand mixer on low speed for 10 minutes. Both work.
- First rise: Grease a clean bowl with neutral oil. Place the dough in the bowl and cover it with clingfilm greased on the underside to prevent sticking, or a damp tea towel. Let rise in a warm place for 1 hour, or until doubled in size.
- Divide and shape: After rising, gently press down the dough to remove air. Divide it into 8 equal pieces and shape each piece into a ball.
- Roll out the dough: On a lightly floured surface, start with the first ball you shaped and roll it out. Lightly flour the top and bottom of the dough and roll into a circle about 3-5 mm thick (¼”), rotating as you go. Repeat with all dough balls. Place them on a lightly floured surface or parchment paper, cover with a cloth, and let rest for 20 minutes.
- Bake or Cook – Choose Your Method
Pick the method that best suits the tools you have on hand:
Oven with Pizza Stone:
Preheat your pizza stone to 530°F (275°C). Bake each rolled pita for 1–2 minutes until puffed and just golden. Let cool for 3–4 minutes.
Oven with Baking Sheet:
Preheat your oven to 480°F (250°C). Dust a baking sheet with flour. Roll each dough ball into a 5 mm thick disc and place on the tray. Bake for 8–12 minutes, or until the pitas are puffed and lightly browned.
Pizza Oven (Gozney or Ooni):
Preheat your pizza oven to 850°F (450°C). Lower the flame or heat slightly before baking. Bake each pita for about 1 minute, or until puffed and golden.
Stovetop Pan Method:
Heat a dry pan or cast iron skillet over high heat. Test readiness with a drop of water—it should sizzle and bead off quickly.
- Place a pita in the hot pan and press gently around the edges to encourage puffing.
- Wait 15 seconds, then flip and press again.
- Wait another 15 seconds, flip again.
- Stop pressing and continue flipping every 15 seconds until the pita puffs fully and is golden on both sides.
- Wipe the pan clean between each pita to remove flour buildup and prevent burning.
- Keep warm and soft: Place cooked pitas in a bowl lined with a tea towel and cover to keep them warm and soft. You can also place them in a plastic bag to trap steam—this helps soften the crust.

Endless Ways to Enjoy Easy Homemade Pita Bread
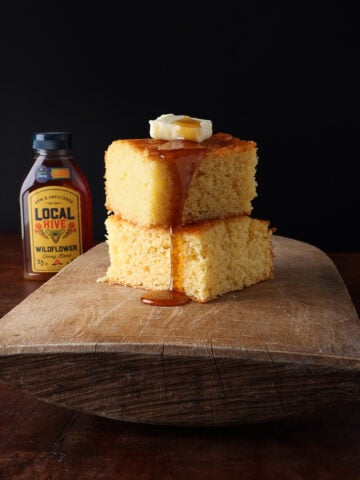
Perfect for kebabs, falafel, or shawarma wraps, this pita is soft and pliable, just right for stuffing with your favorite fillings and a generous drizzle of sauce. Slice into triangles and serve with hummus, beet dip, or mint yogurt sauce for an easy appetizer or mezze platter. These pitas also make the perfect companion to stews, curries, or spiced lentils, soaking up every bit of flavor. And if you're keeping it simple, try them toasted with butter and honey for a cozy snack. Whether served hot or cold, fresh or toasted, they're endlessly versatile. Warning: You may never buy store-bought pita again.

The Dreamiest Way to Enjoy Pita? Hummus, of Course.
Featured Farm - Meet Your Millers:
From Pioneer Roots to Your Table: The Story Behind Jensen Brothers Milling
Every soft, golden pita starts with flour, and behind that flour is a legacy of care. The Jensen family has been milling wheat in Brigham City, Utah, for over a century, with roots tracing back to 1857 when pioneer Mads Christian Jensen brought his milling expertise to the region. Called by LDS leader Lorenzo Snow to help build the new settlement, Mads helped shape the local grain economy through hard work and vision.
By 1909, his sons had founded Jensen Brothers Milling—renamed Big J Milling in 1946—and today, the fifth and sixth generations of the Jensen family continue that legacy. Their commitment to quality wheat flour is the quiet hero behind every homemade loaf and pita pocket. It’s more than just flour, it’s heritage, community, and craftsmanship in every bite.


EQUIPMENT NEEDED
- Large mixing bowl
- Measuring cups and spoons (or kitchen scale for metric accuracy)
- Small wood rolling pin
- Cast iron skillet or non-stick pan (if using stovetop method)
- Baking sheet or pizza stone
- Kitchen towel or plastic wrap
- Dough scraper or knife

Easy Homemade Pita Bread
Ingredients
- 1 ¼ cups lukewarm water (300 ml)
- 2 ¼ teaspoons instant yeast (7 g)
- 1 tablespoon sugar (15 g)
- 3 ⅓ cups bread flour (500 g)
- 1 teaspoon salt (6 g)
- 2 tablespoons olive oil (27 g)
Instructions
- Activate the yeast: In a large bowl, mix lukewarm water, instant yeast, and sugar until combined.
- Add dry ingredients: Add flour and salt, then mix again until a rough dough forms.
- Knead the dough: Turn the dough out onto a lightly floured surface. Knead for 5–10 minutes until smooth and elastic. Or, bring together in a stand mixer on low speed for 10 minutes. Both work.
- First rise: Grease a clean bowl with neutral oil. Place the dough in the bowl and cover it with clingfilm greased on the underside to prevent sticking, or a damp tea towel.
- Let rise in a warm place for 1 hour, or until doubled in size.
- Divide and shape: After rising, gently press down the dough to remove air. Divide it into 8 equal pieces and shape each piece into a ball.
- Roll out the dough: On a lightly floured surface, start with the first ball you shaped and roll it out.
- Lightly flour the top and bottom of the dough and roll into a circle about 3-5 mm thick (¼”), rotating as you go.
- Repeat with all dough balls. Place them on a lightly floured surface or parchment paper, cover with a cloth, and let rest for 20 minutes.
Bake or Cook – Choose Your Method - Pick the method that best suits the tools you have on hand:
- Oven with Pizza Stone:
- Preheat your pizza stone to 530°F (275°C).
- Bake each rolled pita for 1–2 minutes until puffed and just golden.
- Let cool for 3–4 minutes.
- Oven with Baking Sheet:
- Preheat your oven to 480°F (250°C).
- Dust a baking sheet with flour. Roll each dough ball into a 5 mm thick disc and place on the tray.
- Bake for 8–12 minutes, or until the pitas are puffed and lightly browned.
- Pizza Oven (Gozney or Ooni):
- Preheat your pizza oven to 850°F (450°C).
- Lower the flame or heat slightly before baking.
- Bake each pita for about 1 minute, or until puffed and golden.
- Stovetop Pan Method:
- Heat a dry pan or cast iron skillet over high heat.
- Test readiness with a drop of water—it should sizzle and bead off quickly.
- Tip: Cast iron retains heat well—adjust as needed to avoid burning.
- Place a pita in the hot pan and press gently around the edges to encourage puffing.
- Wait 15 seconds, then flip and press again.
- Wait another 15 seconds, flip again.
- Stop pressing and continue flipping every 15 seconds until the pita puffs fully and is golden on both sides.
- Wipe the pan clean between each pita to remove flour buildup and prevent burning.
- Keep warm and soft: Place cooked pitas in a bowl lined with a tea towel and cover to keep them warm and soft. You can also place them in a plastic bag to trap steam, this helps soften the crust.
Notes

Nutrition

DIETARY CONSIDERATIONS
The diet categories listed below are offered as a helpful guide, not as nutritional advice. While I’m not a dietitian, I am a professional baker by day with a deep love for seasonal produce and savory cooking at home. Bite Me Industries is a produce-forward blog that celebrates the flavors of each season through crave-worthy bakes and vibrant, flavor-driven recipes — the kind that transport you to your favorite bakery, café, or cozy bistro.
Here is a quick reference if you are trying to meet a dietary consideration.
- DF (Dairy-Free): Yes – This recipe contains no dairy ingredients.
- EF (Egg-Free): Yes – No eggs are used in this pita dough.
- NF (Nut-Free): Yes – Contains no nuts or nut-based products.
- PB (Plant-Based): Yes – All ingredients are plant-based.
- SF (Sugar-Free): No – Contains a small amount of sugar to activate the yeast.
- VE (Vegetarian): Yes – 100% vegetarian-friendly.
- VG (Vegan): Yes – Fully vegan with no animal-derived ingredients.

Leave a Reply